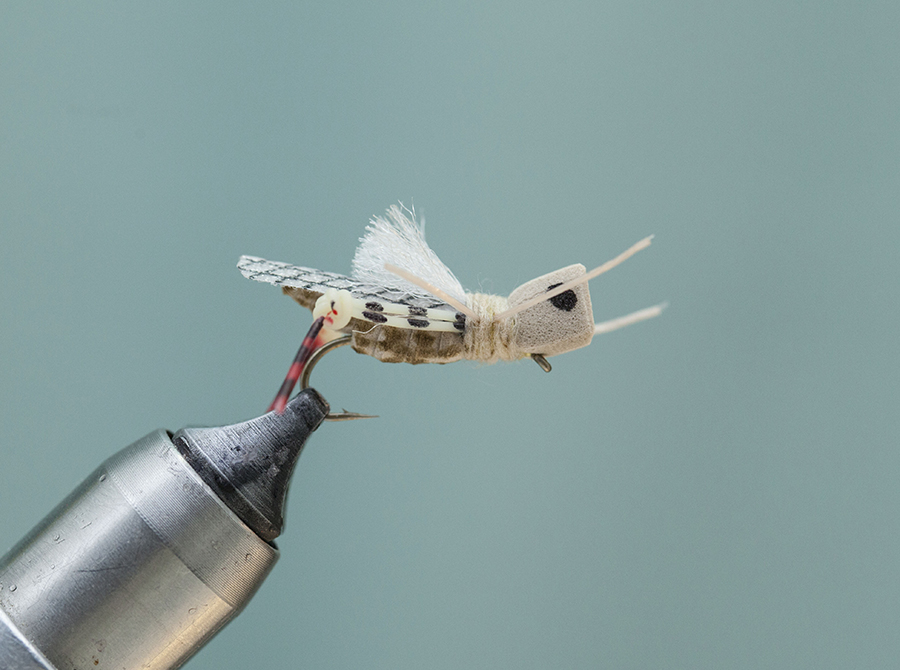
PATTERN DESCRIPTION:
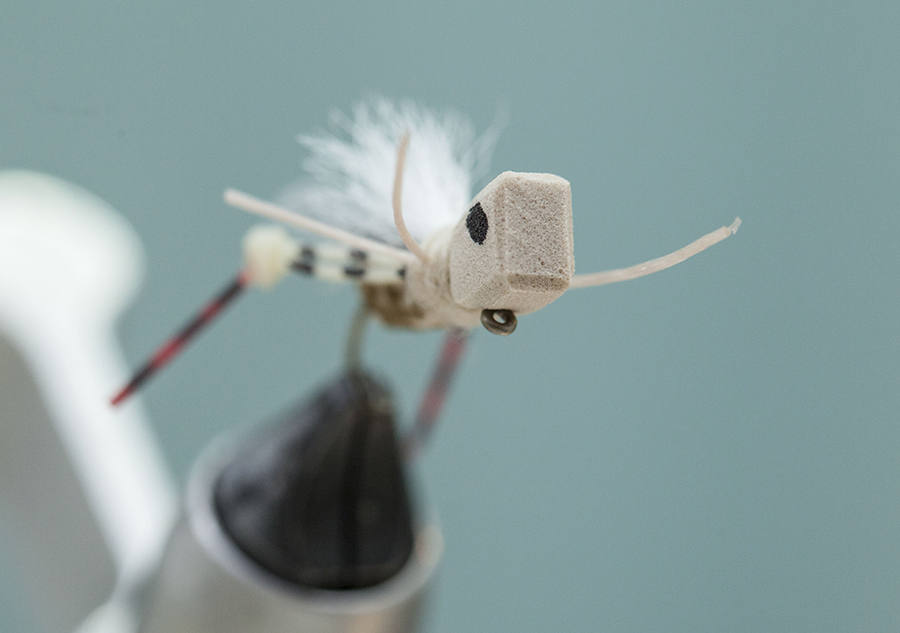
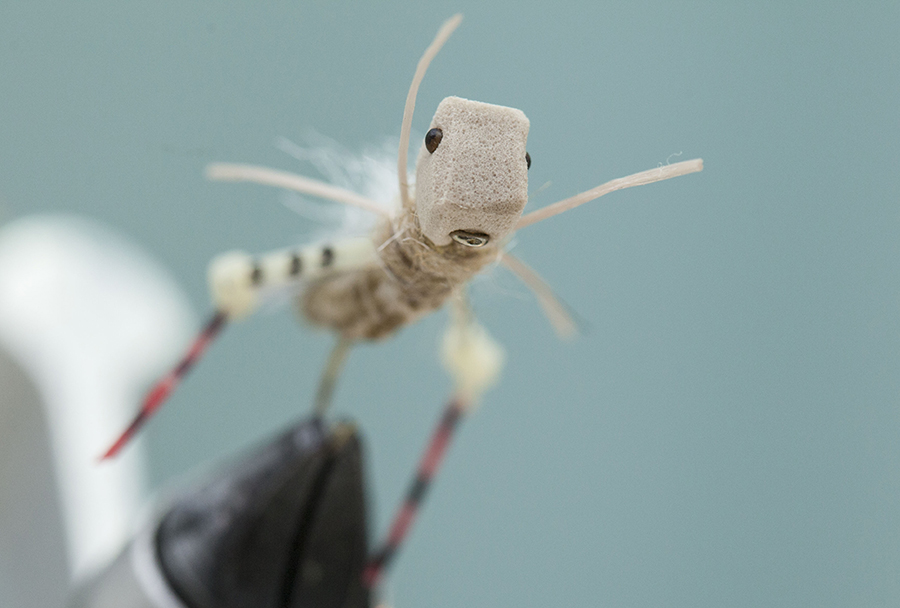
The Carnage Hopper from MFC is a great hopper pattern that should be in everyone’s terrestrial fly box. This realistic foam hopper has a unique segmented body, eye-catching red rubber legs, and a durable over-wing. There are days when the fish seem to really key in on the color red incorporated into certain patters like the legs on the Carnage Hopper and Stalcup’s Hopper, or the red tail on the Streambank Hopper and Dave’s Hopper. This pattern is a durable, high-floating grasshopper that is fun to tie and catches fish. Tie some up and let me know how they work.
MATERIALS NEEDED:
Hook: Dai-Riki #730 nymph hook. For the last few years I’ve been tying all my foam hoppers on nymph hooks because of their durability, plus my hoppers seem to land upright more often with the heavier hooks.
Thread: UTC 140 denier. The best foam pattern tying thread because of its strength, and the fact that it doesn’t cut fly tying foam because its a flat thread.
Body: 1mm foam
Over-wing: MFC Flex-wing.
Back Legs: Hareline round medium legs. Natural color
Head: 6mm foam
Post: White poly yarn
Front legs: X-small rubber legs.
Dubbing: Dry fly dubbing to match body color.
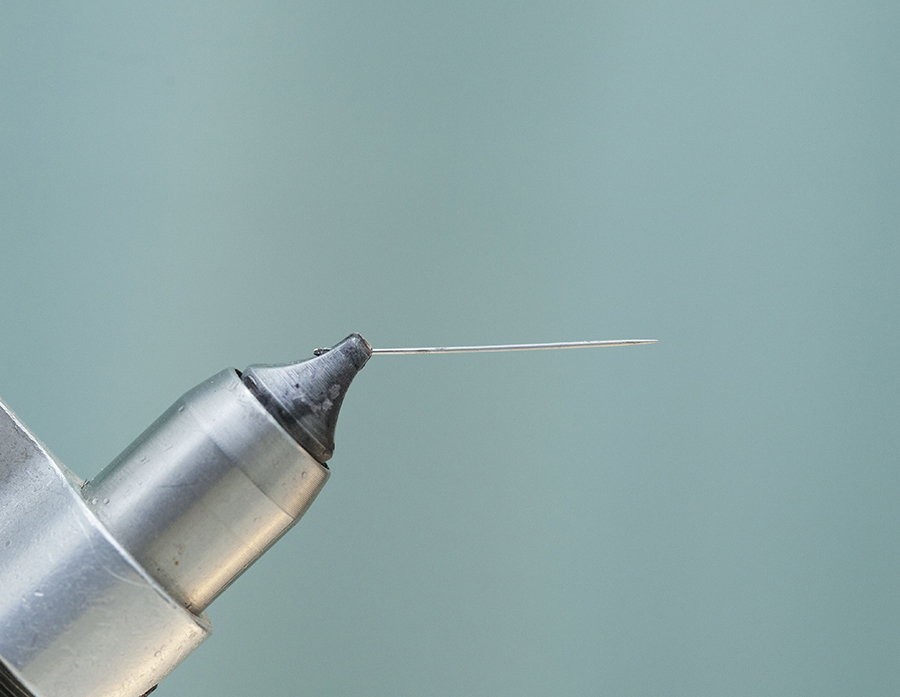
Step 1: Place a thin needle in the vise.
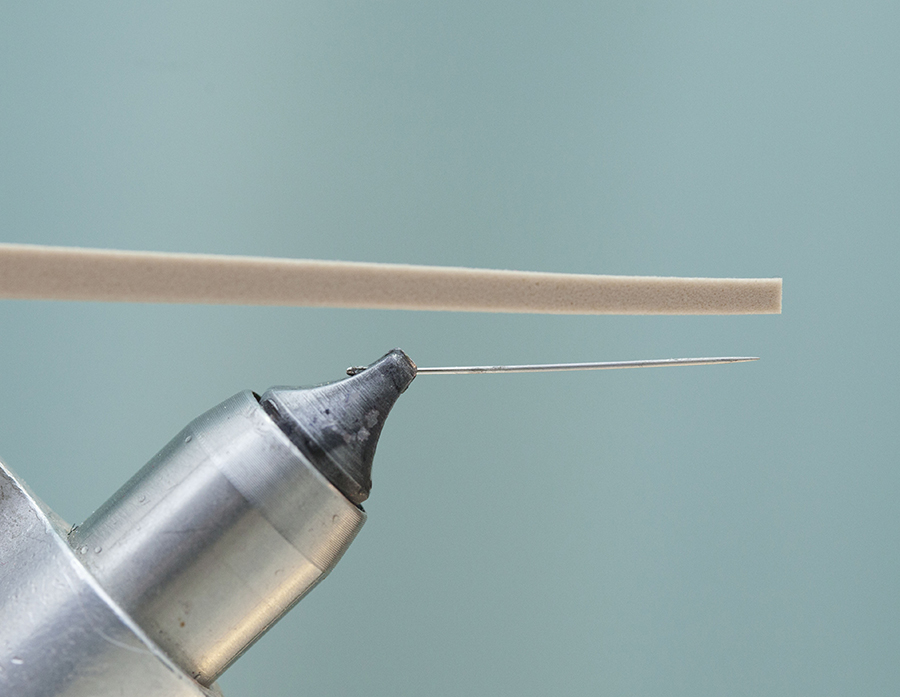
Step 2: Cut a thin, tapered strip of 1mm foam. Strip of foam should taper from 1/2 gap of hook at the narrow end, to 3/4 gap of hook at the thicker end and be 3-4 inches in total length.
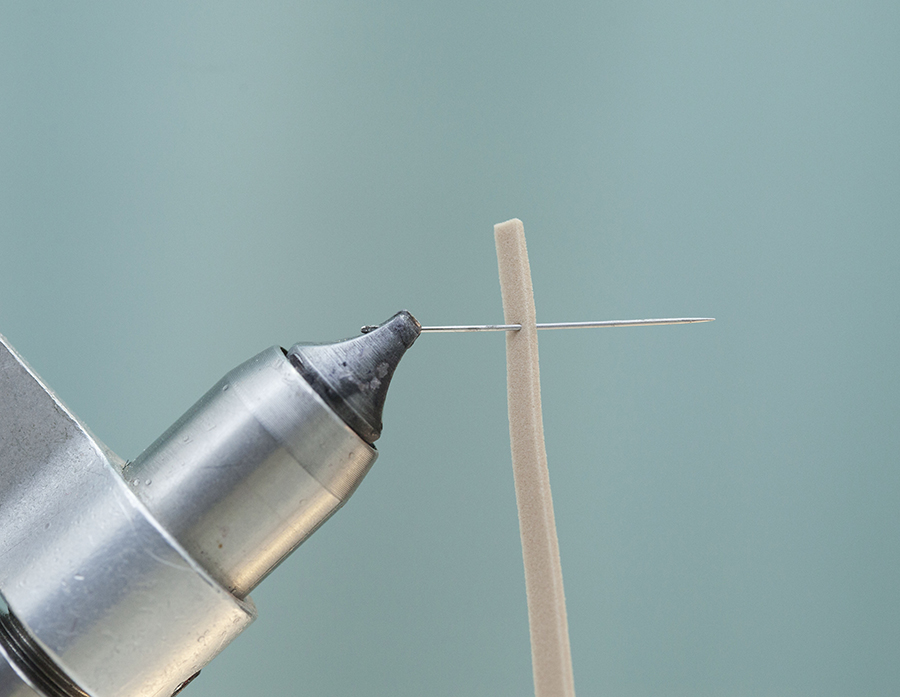
Step 3: Place narrow strip of foam on needle as shown above. You want about a 1/2 inch of foam extended above the needle. Next, apply some dubbing wax to the needle. The wax will keep the foam from bonding to the needle after the super-glue is applied in the next step.
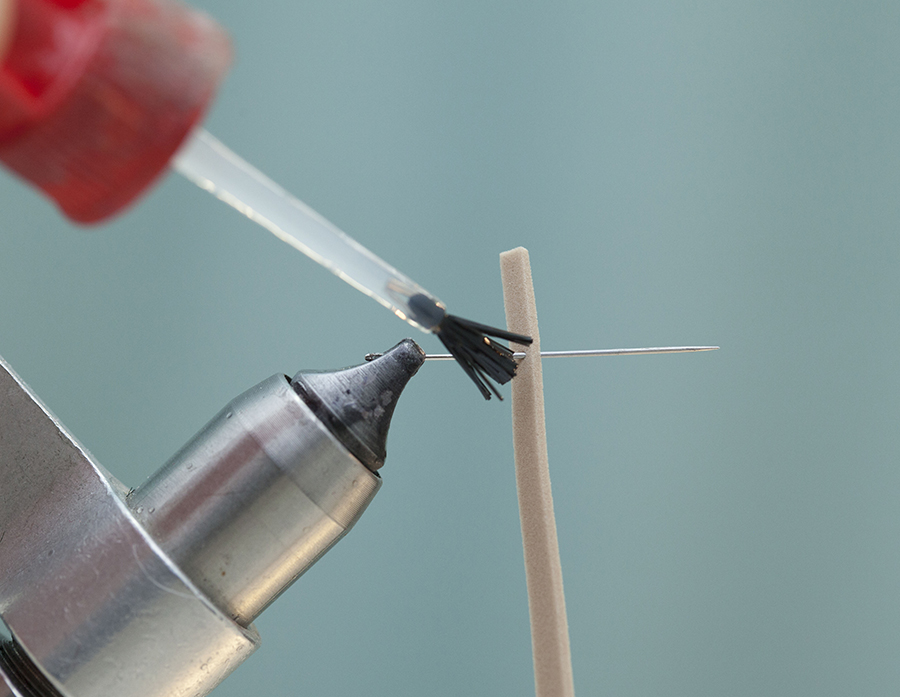
Step 4: After applying the dubbing wax to the needle, brush on a thin layer of super-glue to the foam strip.
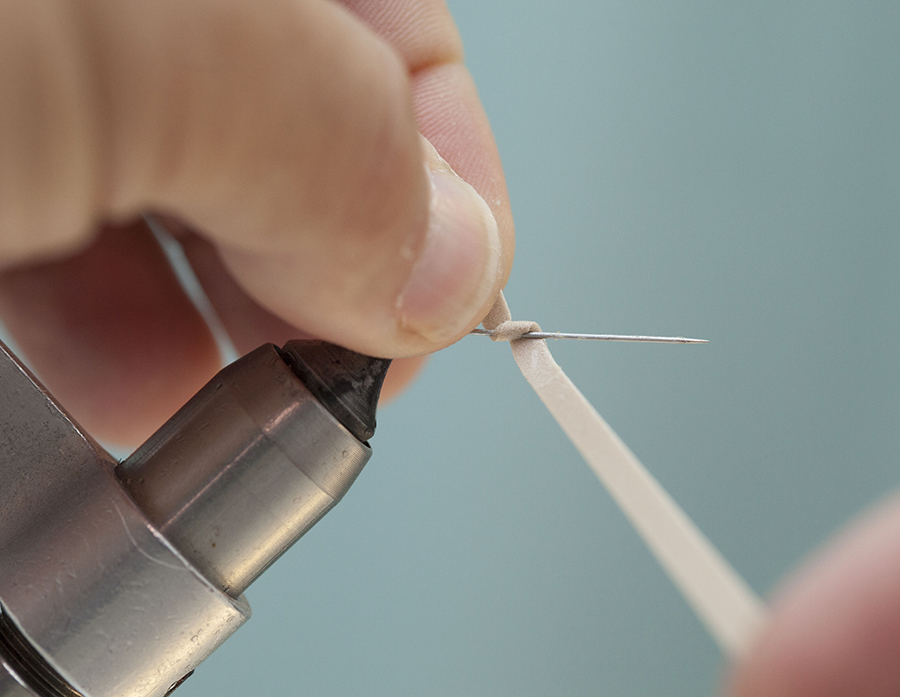
Step 5: After applying the super-glue, hold the short end of the foam strip with one hand. With the other hand, wrap the foam strip around the hook, overlapping the foam with each turn.
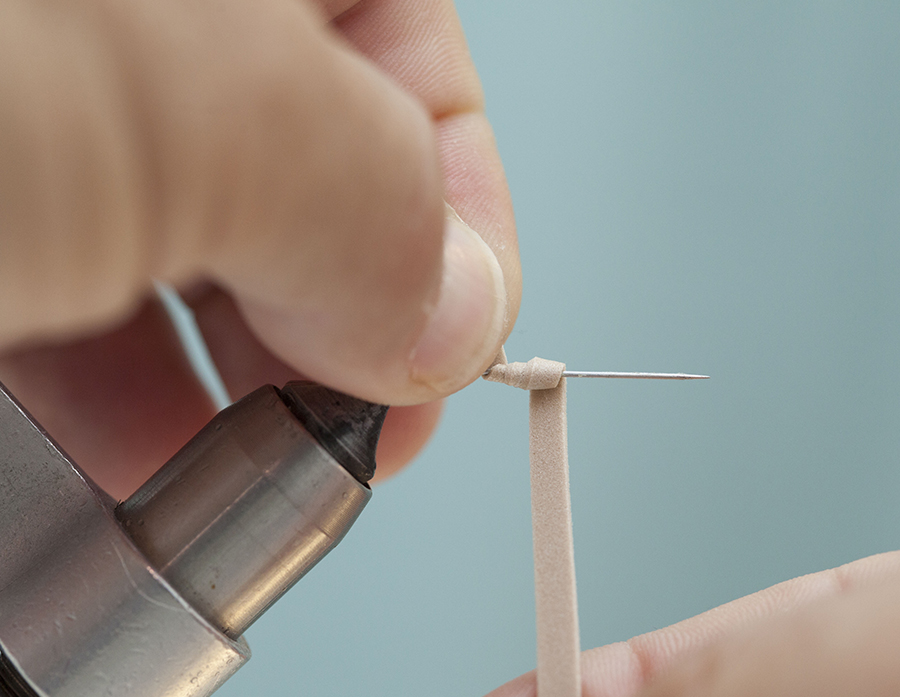
Step 6: Continue to wrap the foam forward until you have 4-6 wraps of foam around the hook. Notice the slightly tapered foam strip is forming a gradually tapered body.
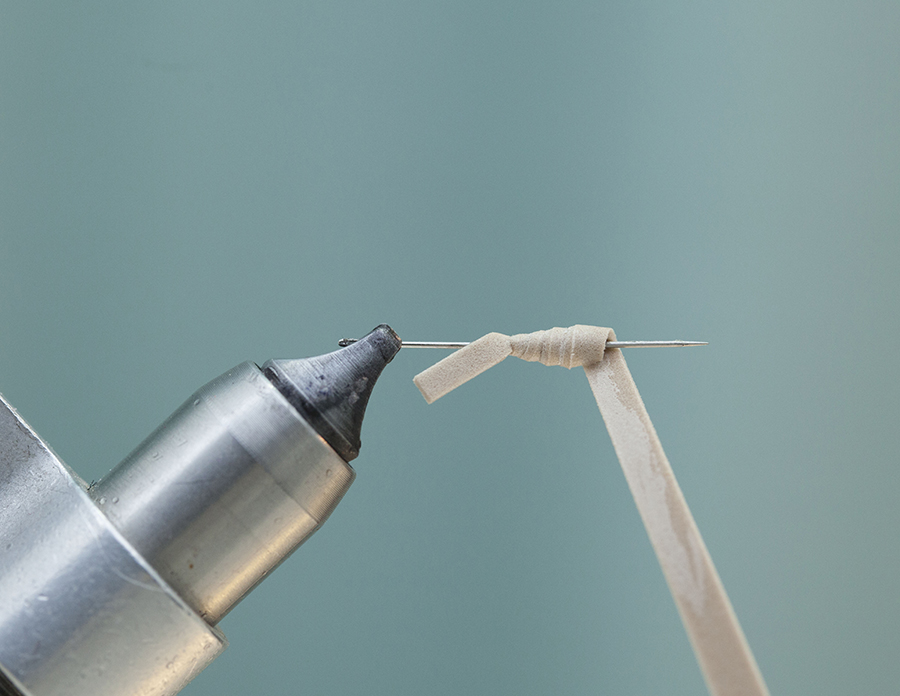
Step 7: After 4-6 foam body segments are formed, you should be able to let go of the foam strips. Remember, a thin layer of super-glue will bond better than a thick layer of super-glue. Next, slide the foam body off of the needle.
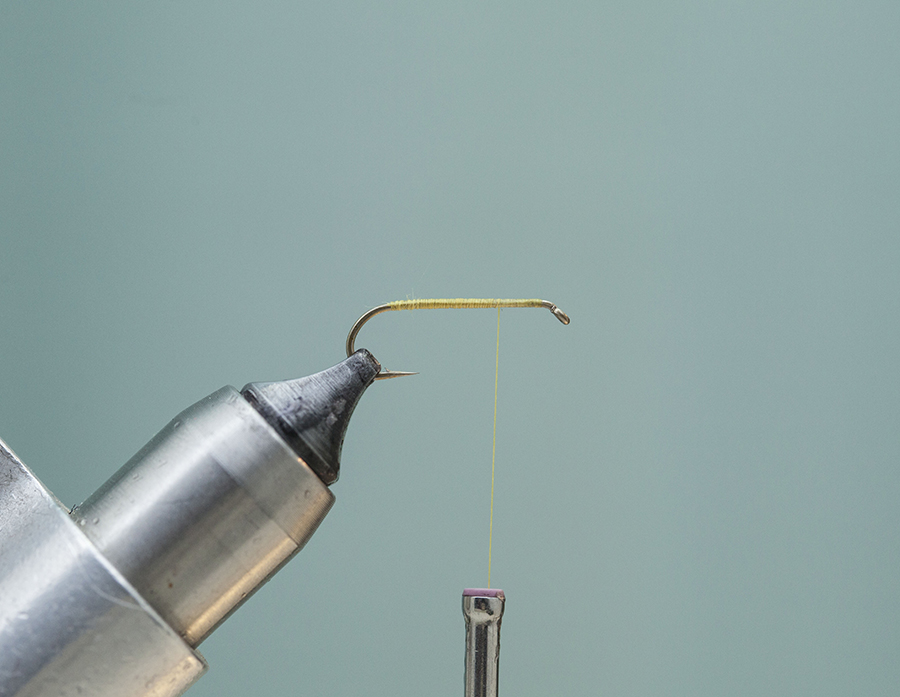
Step 8: Form a thread base on the hook. End thread as pictured above.
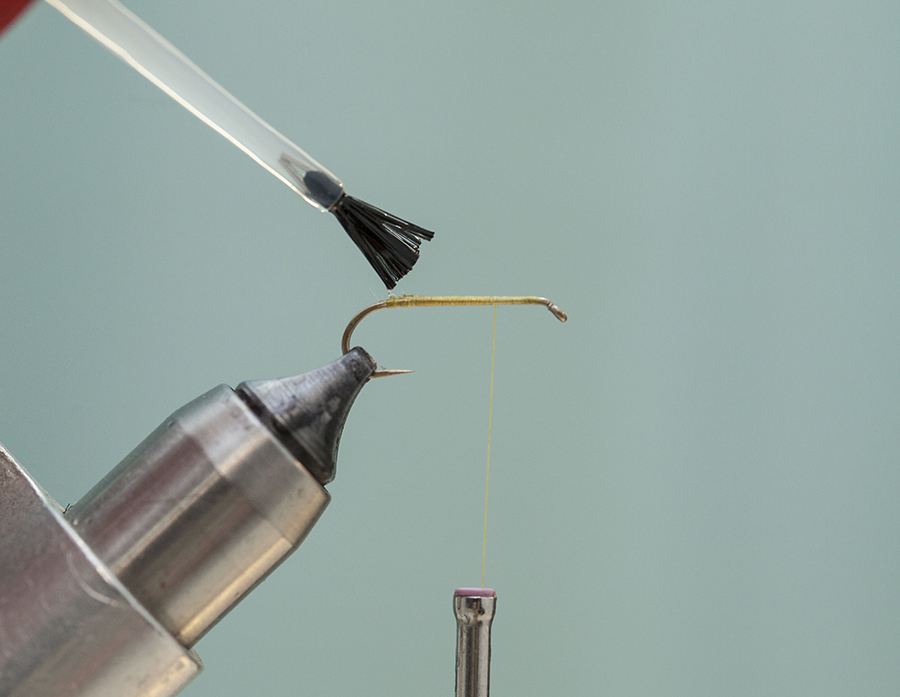
Step 9: Apply a thin layer of super-glue to the end of the thread base.
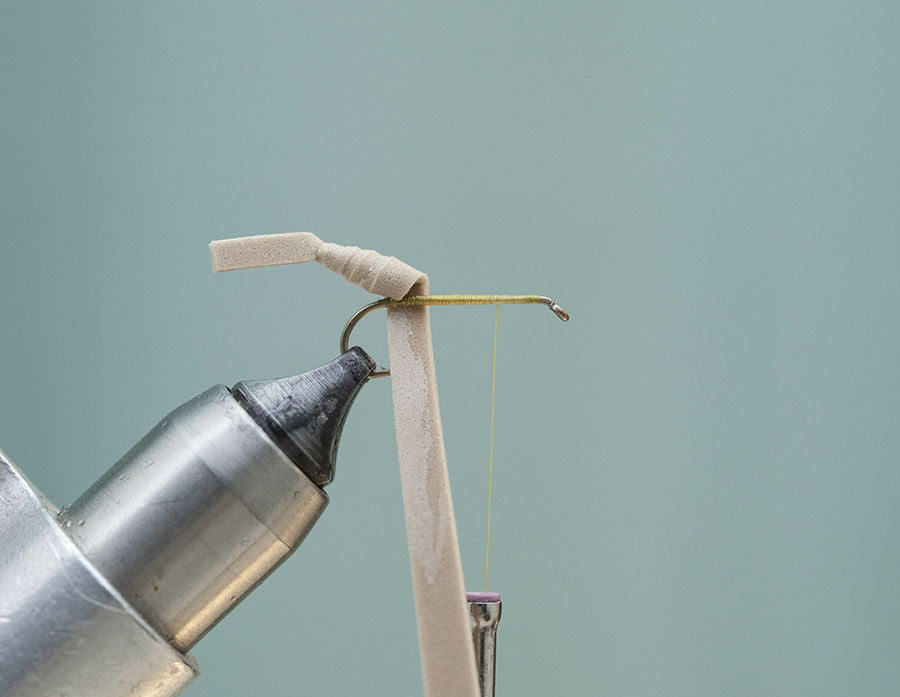
Step 10: Place the extended foam body on top of the hook. Notice that the tapered foam strip is facing down and on the back side of the hook. Also, the edge of the foam strip is in line with the barb.
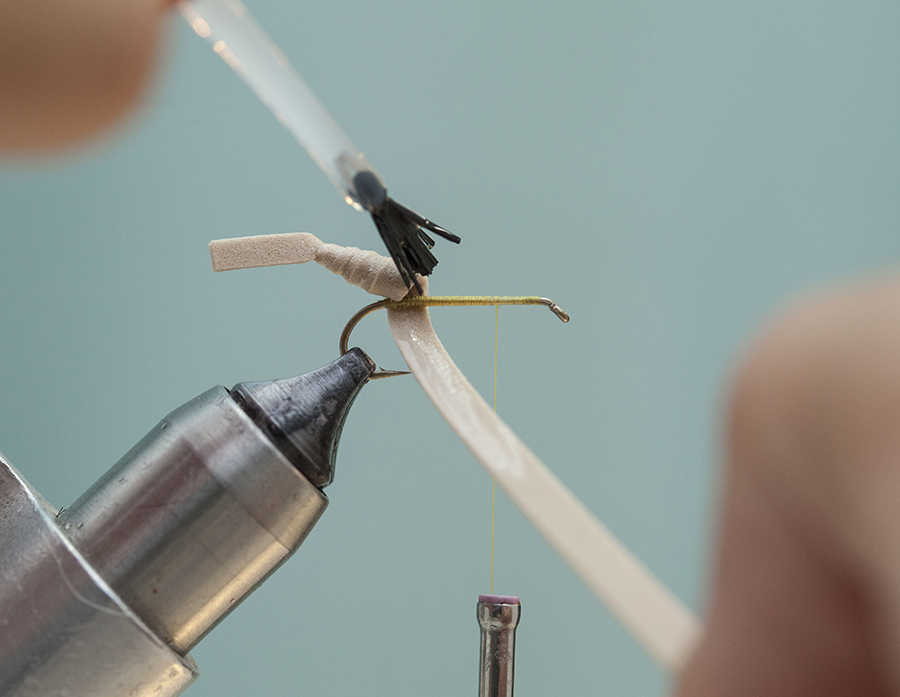
Step 11: Apple a thin layer of super-glue to the extended body, as pictured above, and along the foam strip.
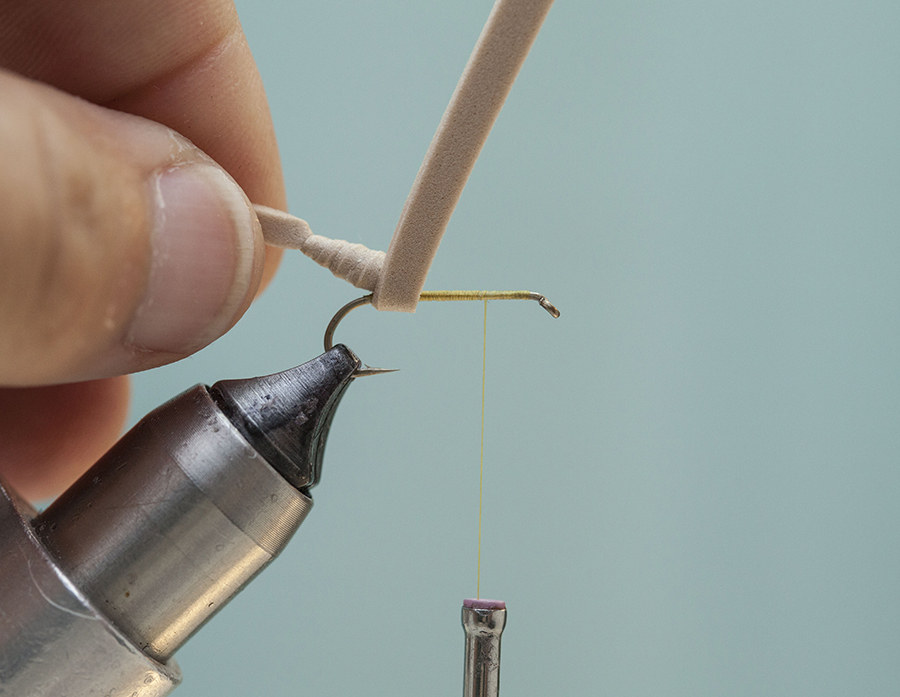
Step 12: Wrap the foam strip around the hook/extended body.
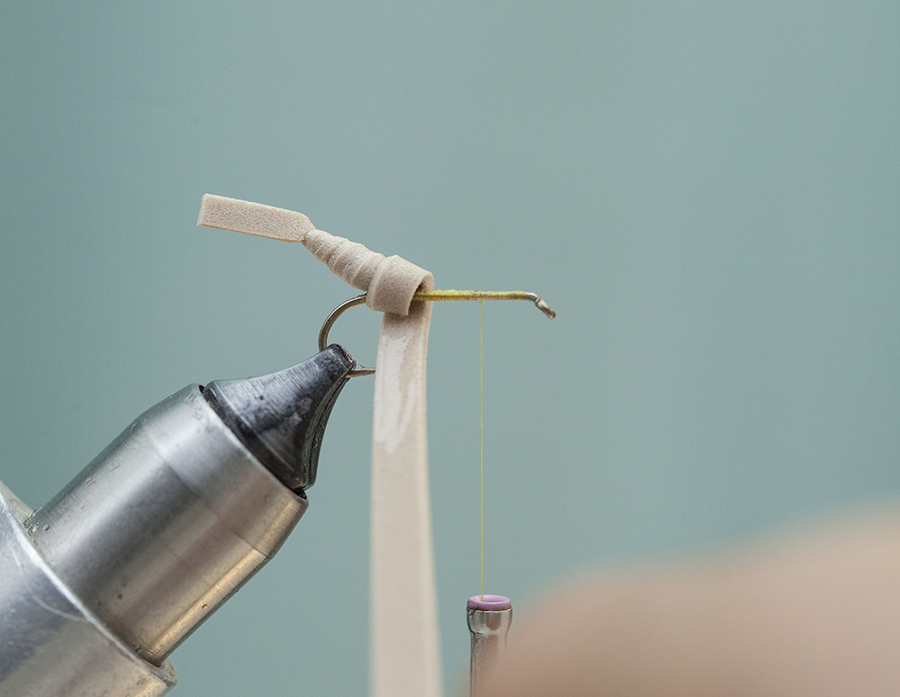
Step 13: Next, apply a thin layer of super-glue along the foam strip and on the hook up to the bobbin thread.
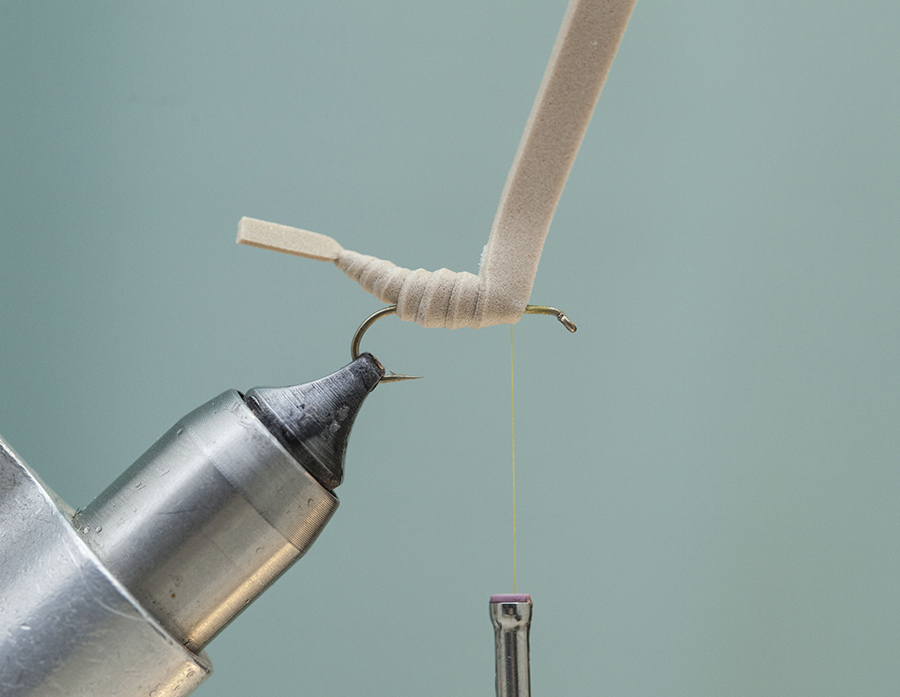
Step 14: Wrap the foam strip forward to achieve the desired segments. Usually 4-5 segments will create the desired look. Above, I applied 4 wraps/segments for a size 10 hopper.
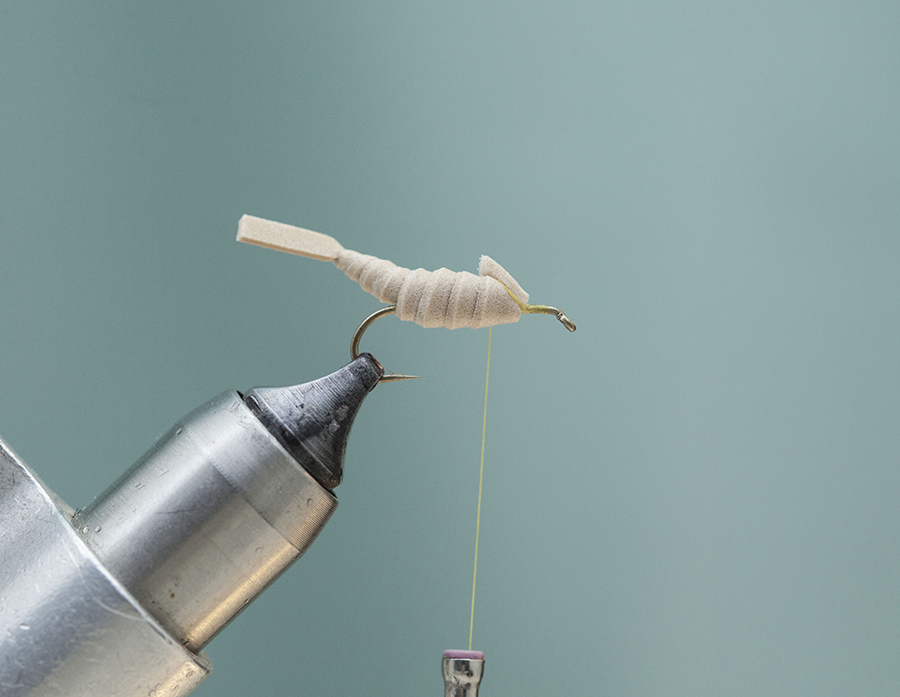
Step 15: Bind the foam strip down with a few wraps of thread. Next, trim the remaining strip of foam flush, at an angle.
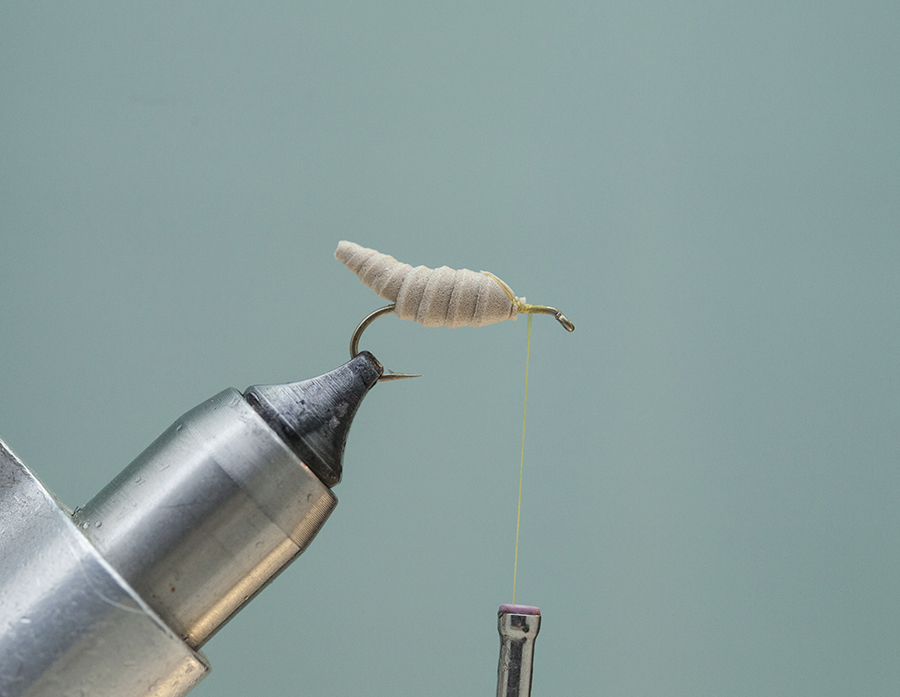
Step 16: Trim the remaining strip of foam off the tail of the hopper body. Wind thread to 2-3 eye lenghts behind eye of hook.
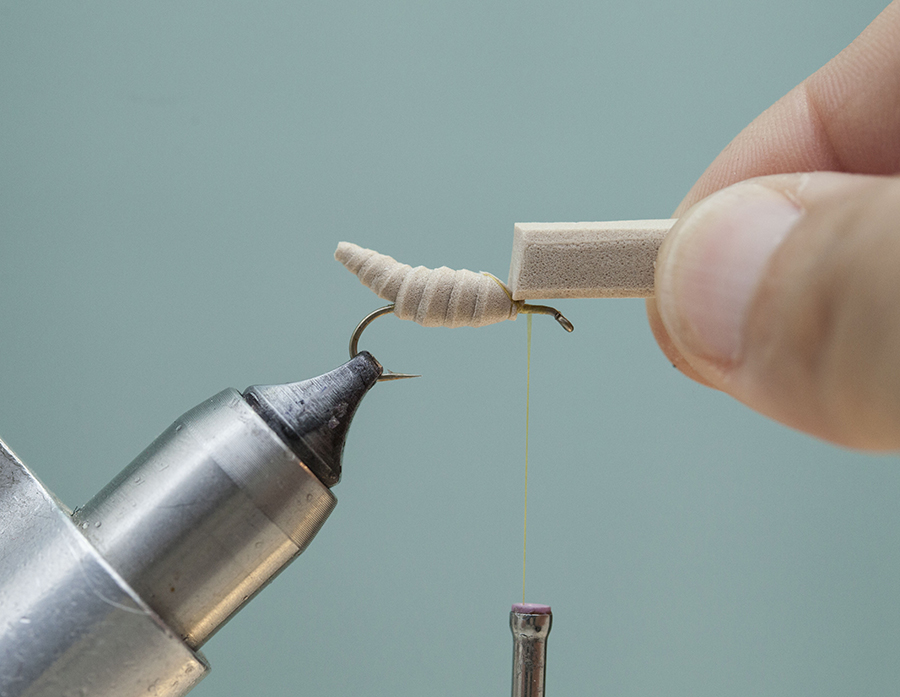
Step 17: Cut a strip of 6mm foam to form the head of the hopper. The strip of foam should be 6mm tall (or 1 hook gap tall), and 4mm wide (or 3/4 hook gap in width) and 1/2″ long.
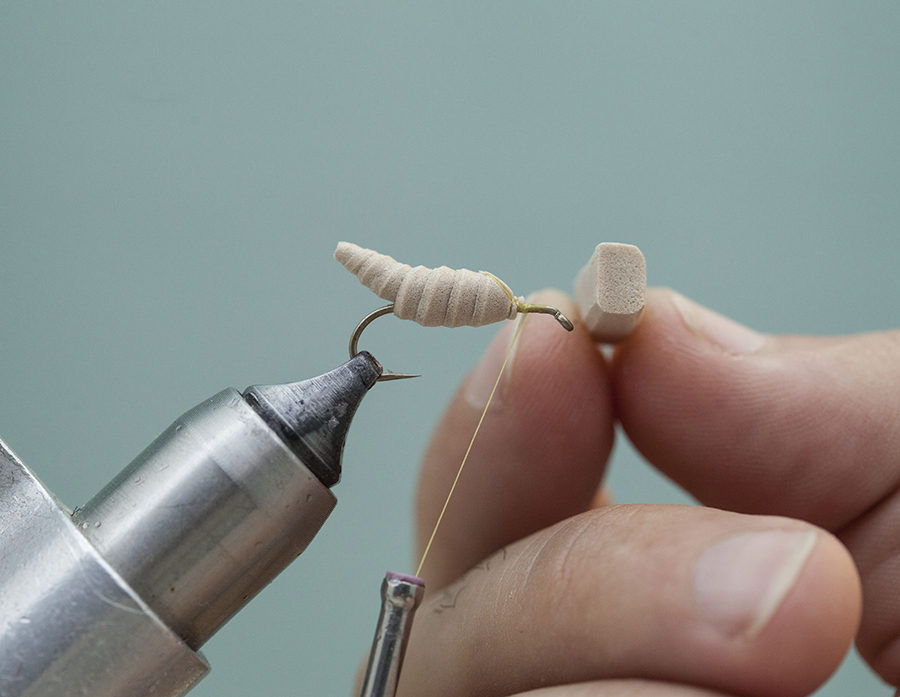
Image of foam dimensions.
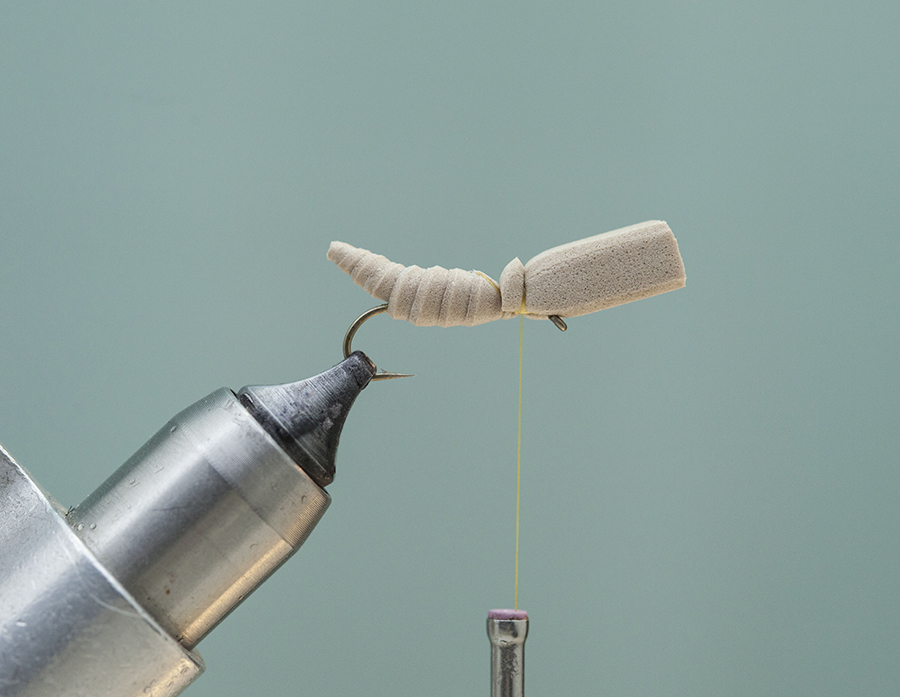
Step 18: Bind down 6mm foam strip with 3-4 firm wraps of thread.
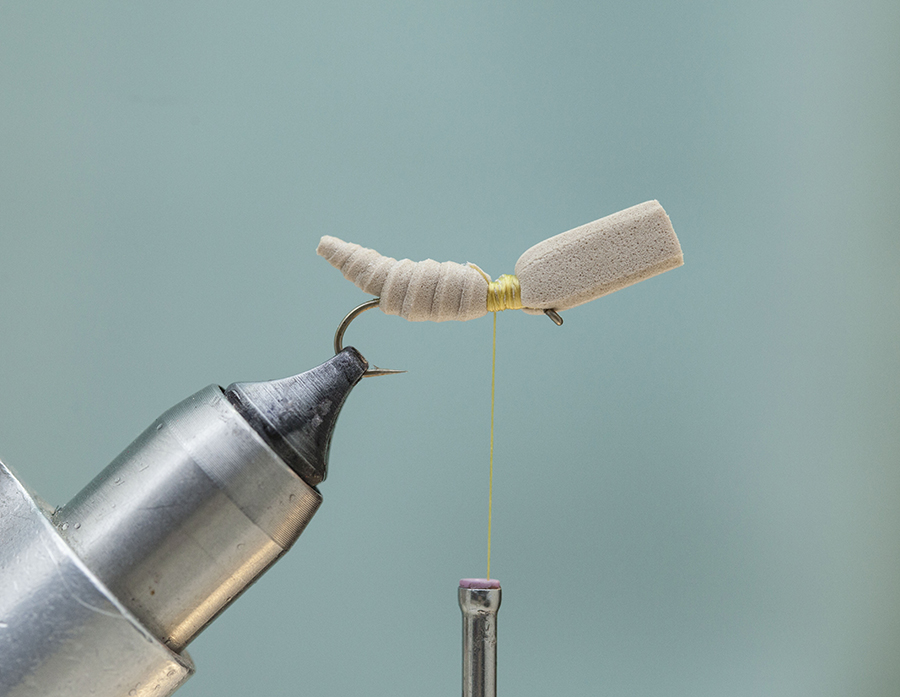
Step 19: Firmly bind down the hopper head and body with a few more wraps of thread. Try not to crowd the eye of the hook with thread wraps.
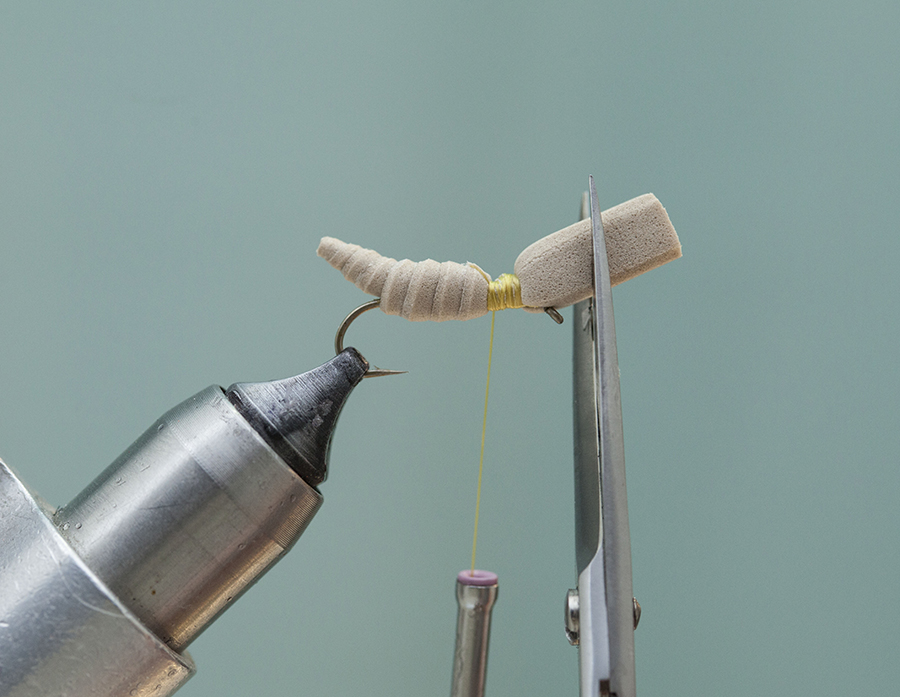
Step 20: Trim head of hopper to shape as shown above. Notice the cut with the scissors is vertical.
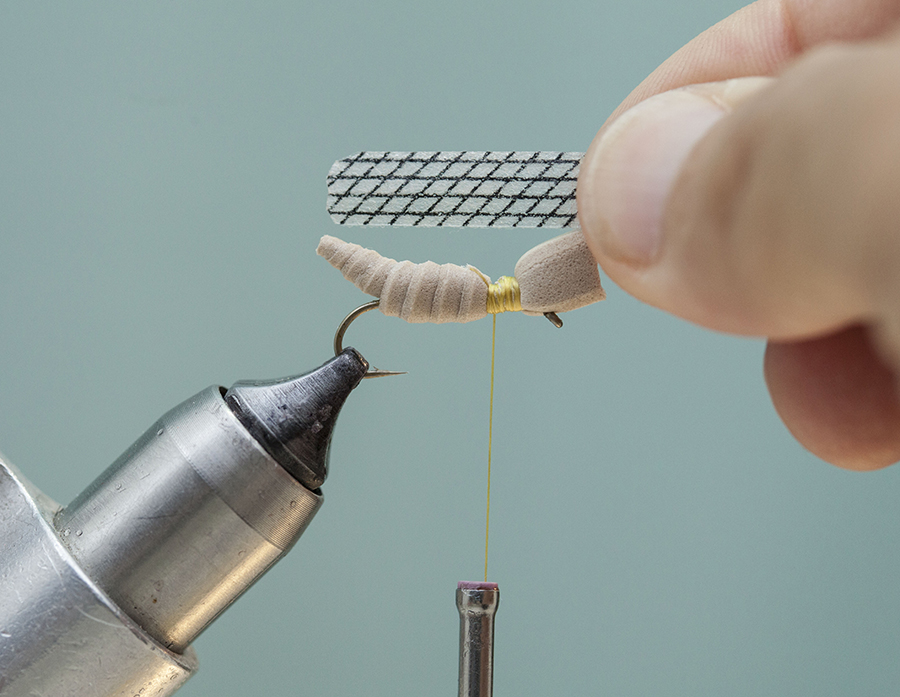
Step 21: Cut a strip of MFC Flew wing to shape. The wing should be about a hook gap in width, and length of the hopper body.
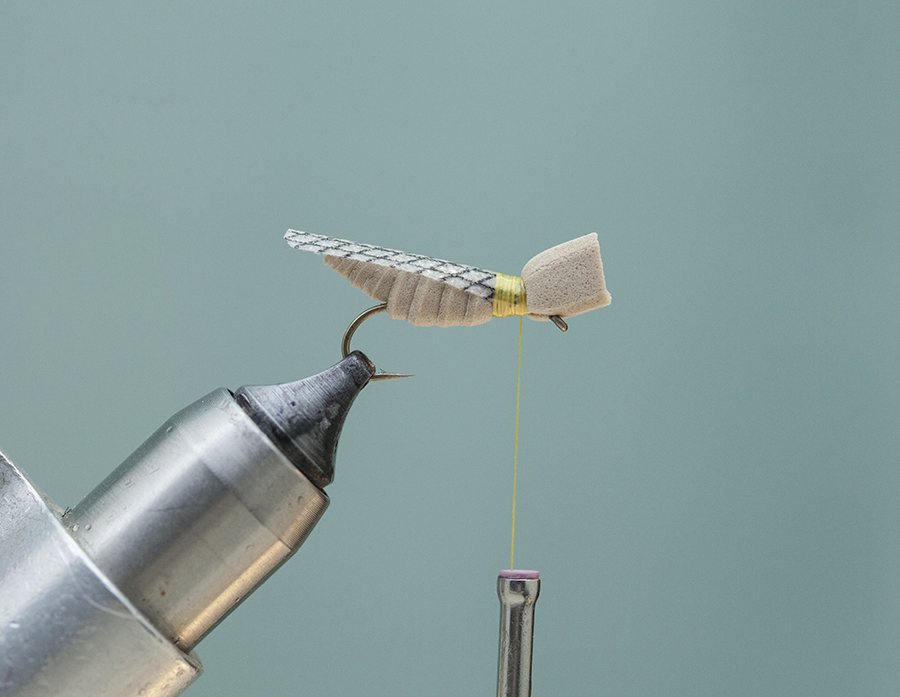
Step 22: Bind down hopper wing with 5-6 firm thread wraps.
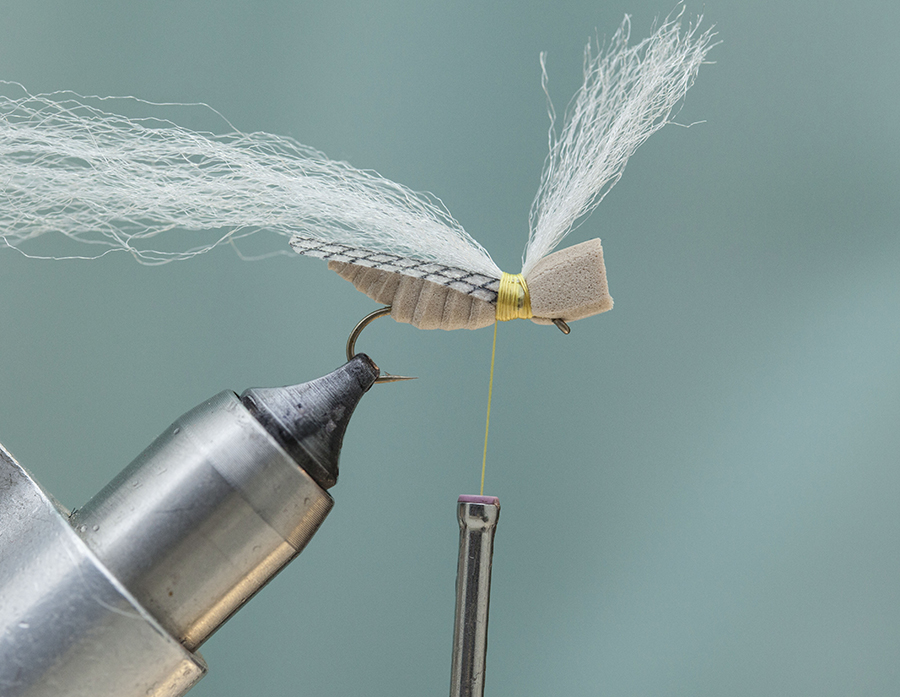
Step 23: Apply a strand of poly yarn for the post.
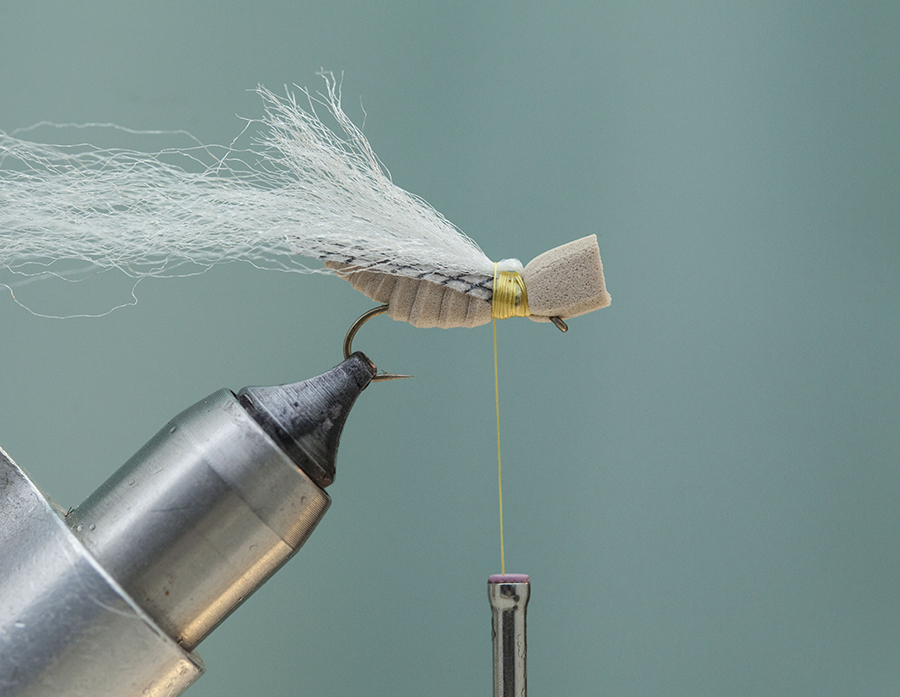
Step 24: Double the poly yarn over, and secure with a few wraps of thread.
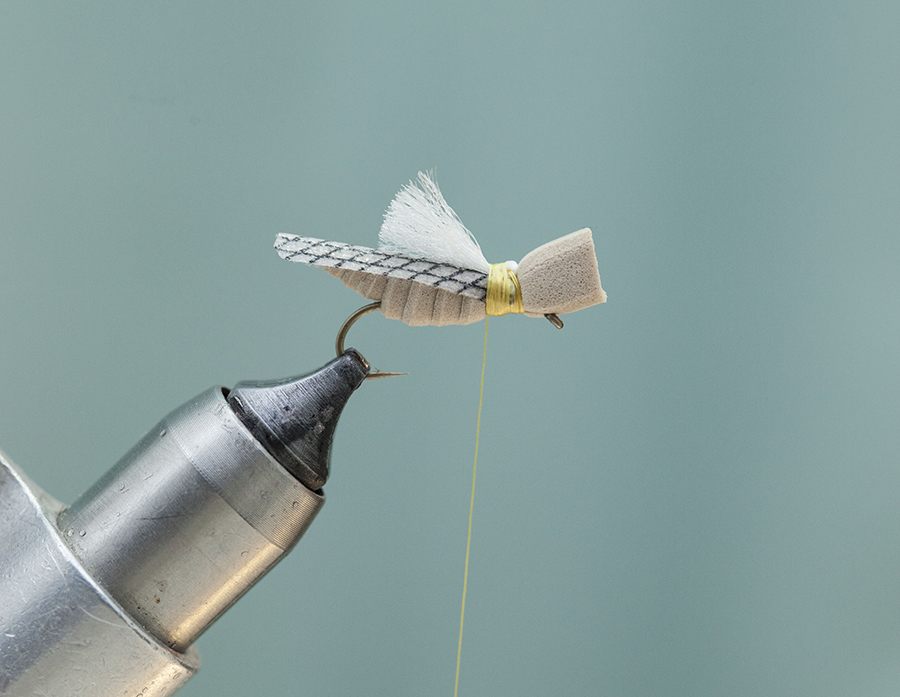
Step 25: Trip the post to length. Post should extend to barb of hook.
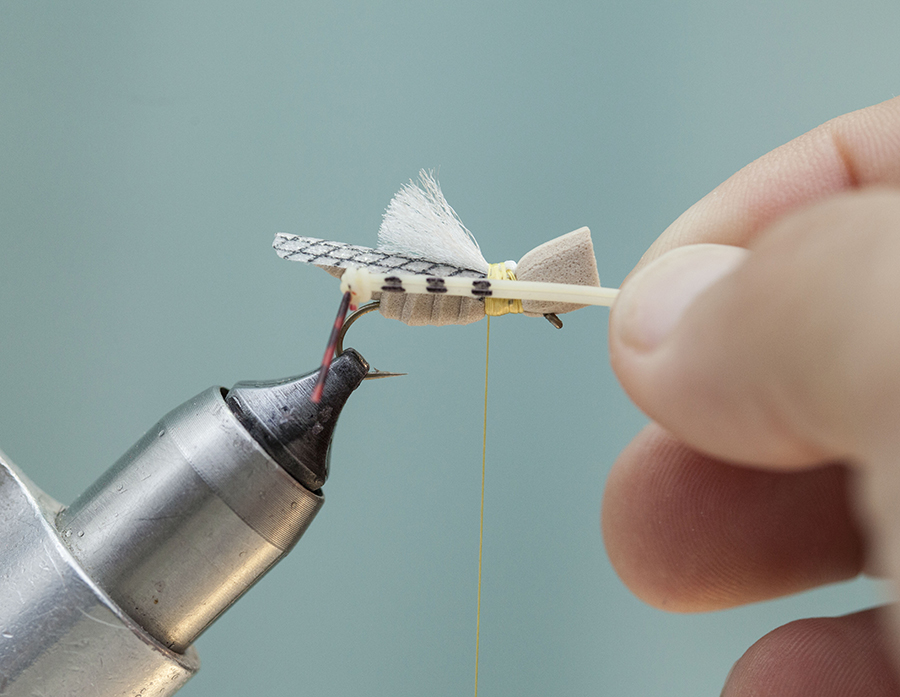
Step 26: Make a pair of knotted hopper legs. Next, color the legs black and red with a Sharpie pen.
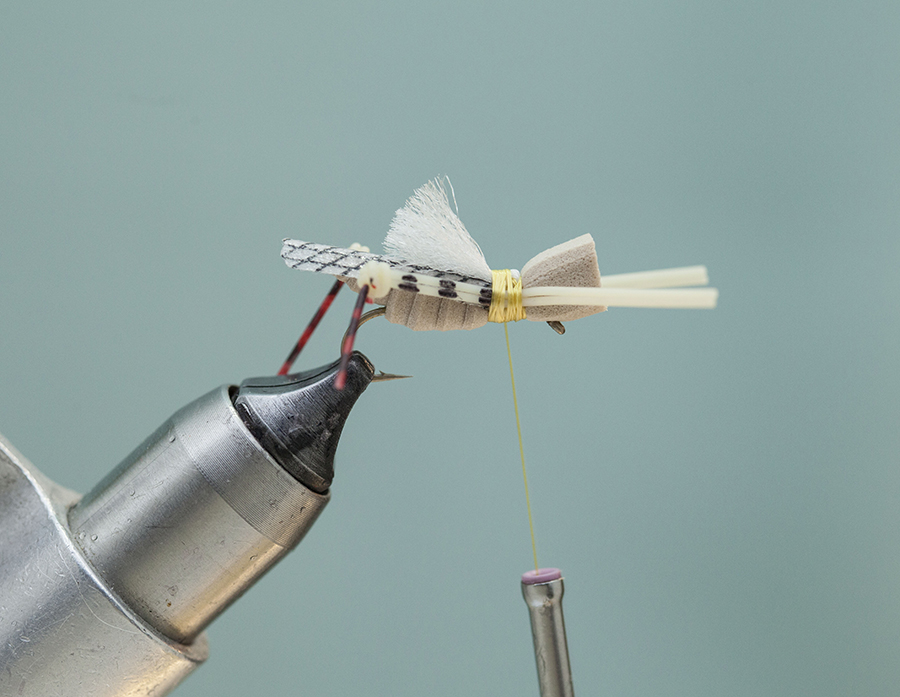
Step 27: Secure the hopper legs on both sides of the hopper. The knots in the legs should extend to bend of hook.
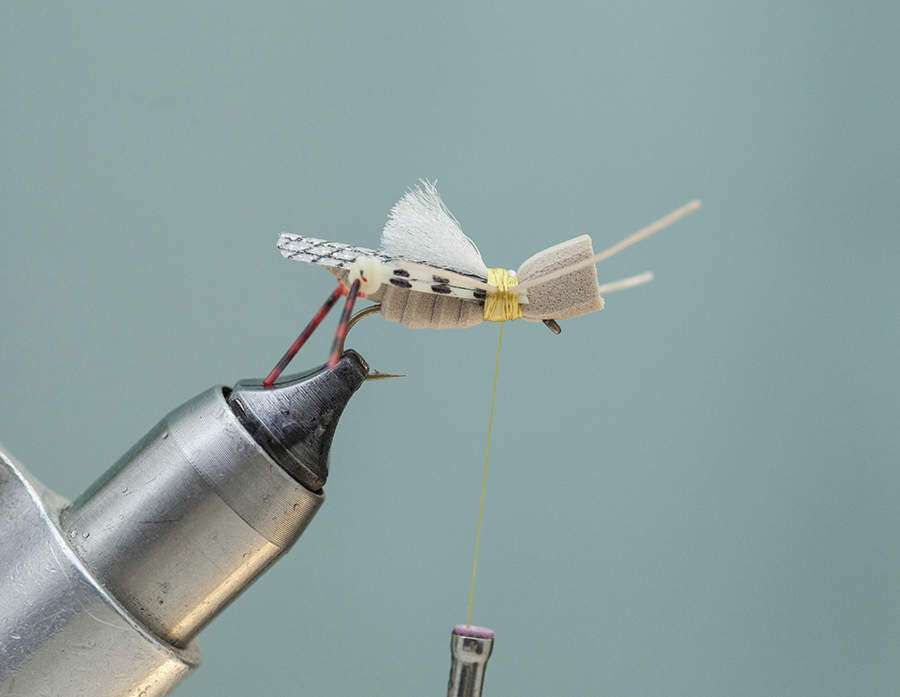
Step 28: Trim the hind leg tag ends flush with the thread wraps. Next, bind down the front legs of the hopper as shown above.
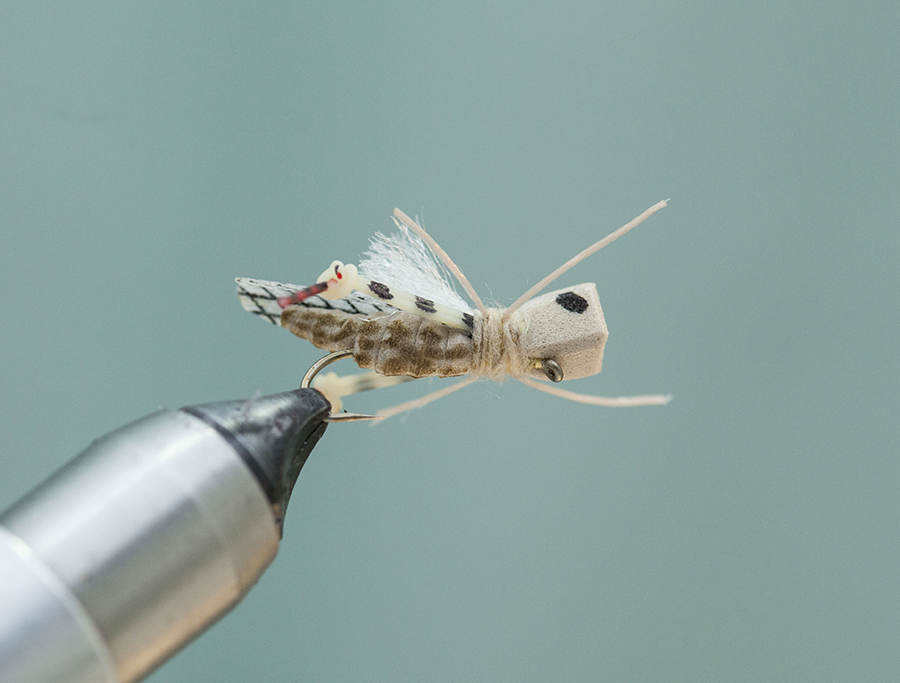
Step 29: Cover the thread wraps with dubbing and whip finish fly. Add eyes and body marking with permanent marker.
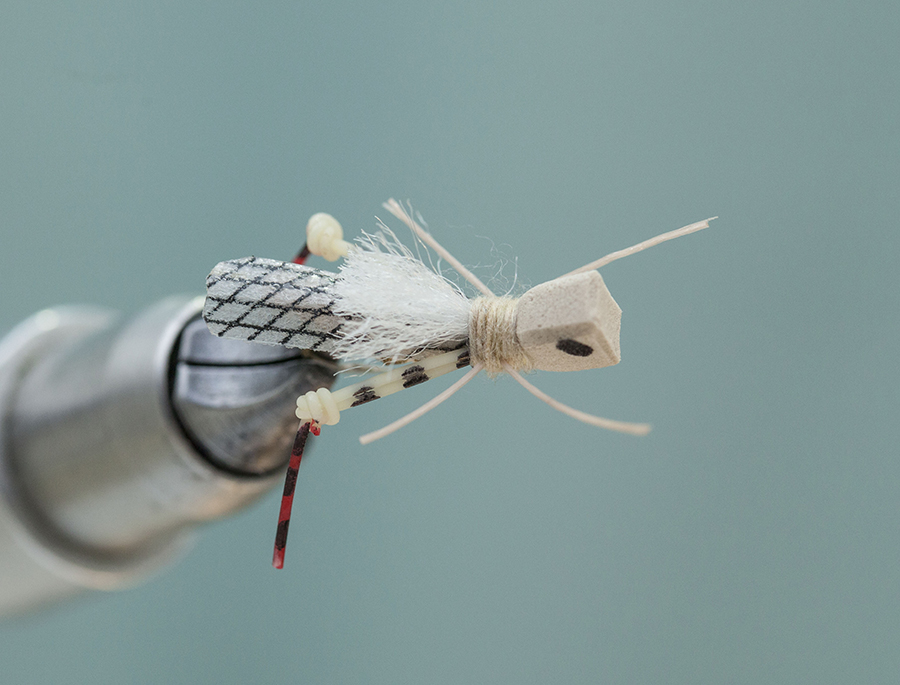
Completed Carnage Hopper

very nice for the long days of winter ahead. looks great. thanks!
Awesome tutorial! ! really like how you made the body wrapped on a pin first, I’ve never seen that before. the Mono eyes look best!
Fantastic pattern. Thanks for the recipe. Were do you get that thick foam for the head?
I’m agree with Nate, the extended body it’s amazing, i try to make some of this!
i’m trying to tie this fly, but can’t locate tan colored 6mm foam? can you share where you buy yours?
For anyone tying this pattern looking for the 6mm foam that I use for the head, we carry it in a variety of colors. You can find the tan here: http://www.hopperfishing.com/store/products-page/6mm-foam/6mm-foam-tan/