PATTERN DESCRIPTION:
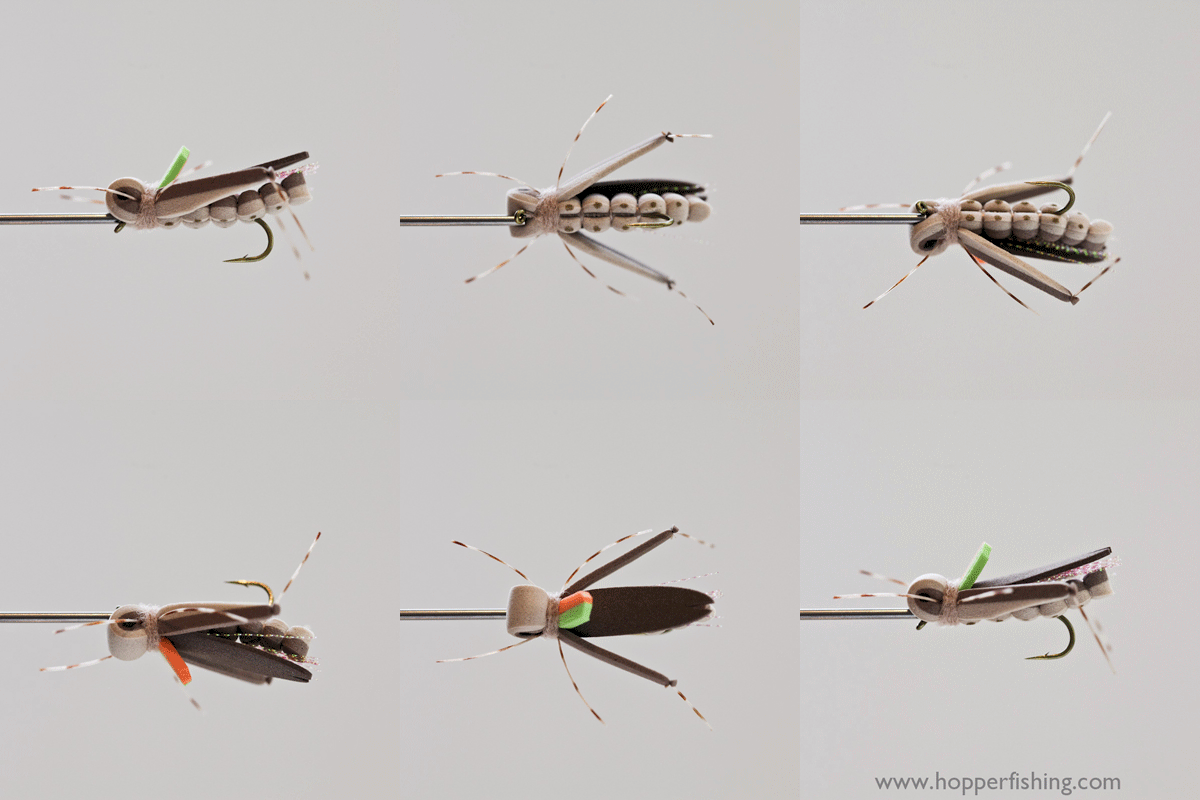
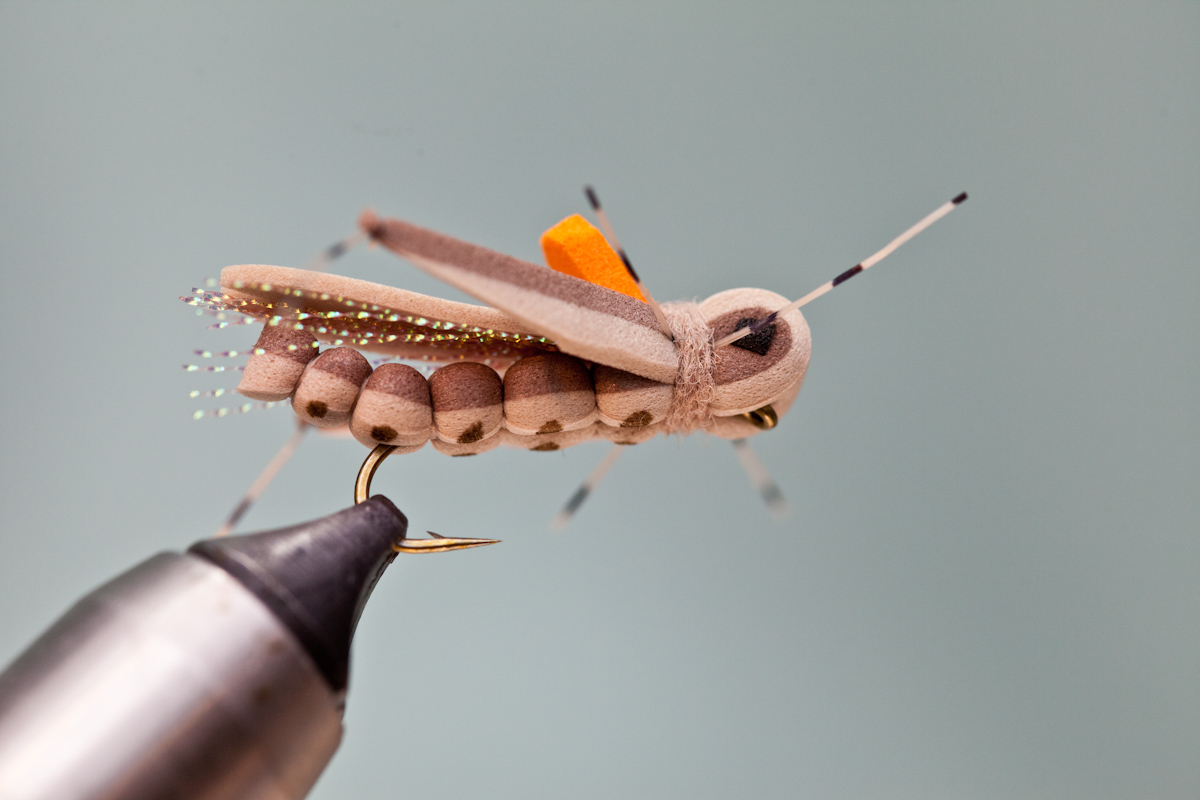
The Improved Thunder Thighs Hopper was my go-to hopper pattern last summer in sizes 8-14 in tan, goldenrod, and flesh. As the summer went on, this hopper seemed to fish better and better. The realistic silhouette of this grasshopper pattern with its thick foam/rubber legs, bullet-head, large eyes and flashy wing seemed to trigger trout consistently throughout the summer, even in low, clear, late summer conditions. The realistic legs on this pattern set this terrestrial apart from most other hoppers. I also used this fly as part of a hopper/dropper setup with great results. The fly seemed to always land upright and supported heavy tungsten bead-head copper johns 0r pheasant-tails without a problem. This fly also works great with a thick poly-wing substituted for the thin foam-wing. The poly-wing aids in floatation and visibility making this a must-have pattern when fishing from a drift boat.
MATERIALS NEEDED:
Hook: 2 x-long nymph hook.
Thread: UTC 140 denier or Veevus 8/0. Both great foam tying thread options.
Body: Two-Tone foam with a total thickness of 4mm.
Underwing: Micro flash, rootbeer color.
Wing: 1mm tan foam.
Legs: Thinly sliced two-tone foam, super-flex material. You can knot on any rubber leg material. The super-flex material is very durable and stays knotted to the foam strip with a simple over-hand knot.
Eyes: 2mm black foam strip.
Post: 2mm hi-viz foam strip.
Dubbing: Tan dubbing of choice.
Thunder Thighs Hopper Kit: We offer kits on our store with bodies, wings, legs, hi-viz foam & black eye foam all in one kit!
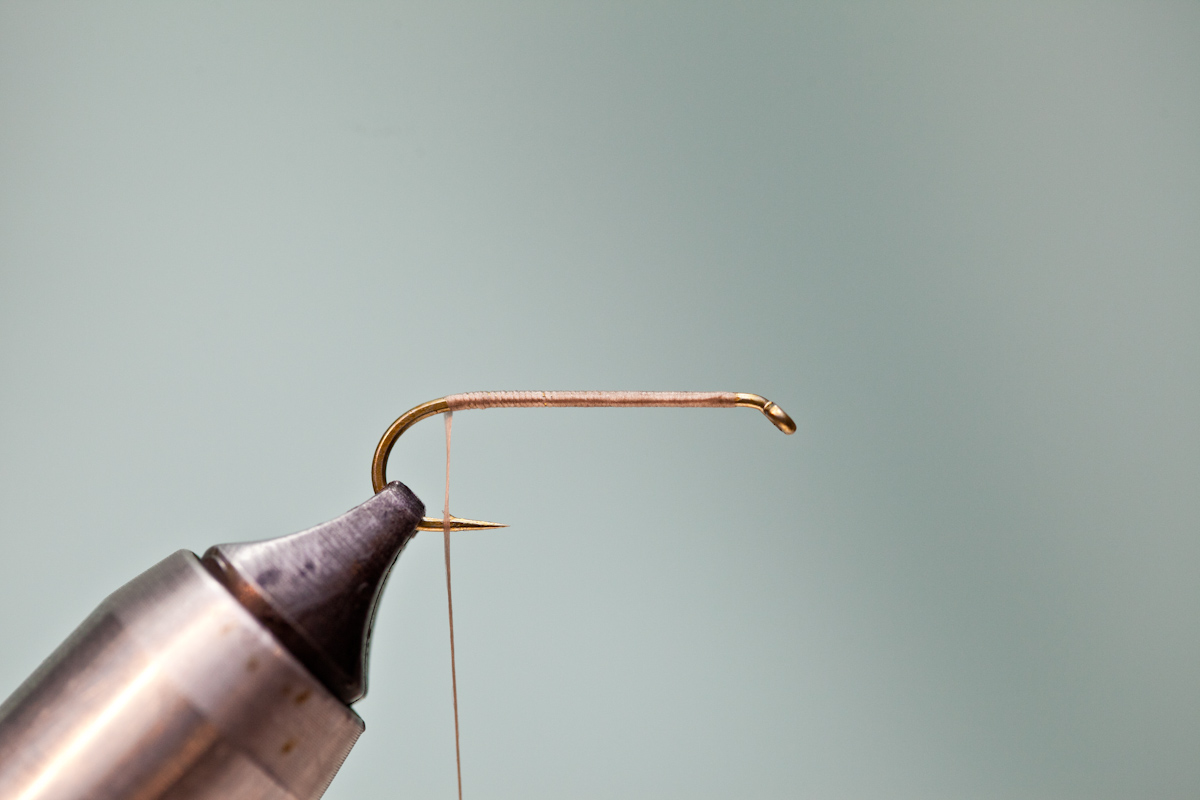 Step 1: Form a thread base on hook. End thread at hook barb.
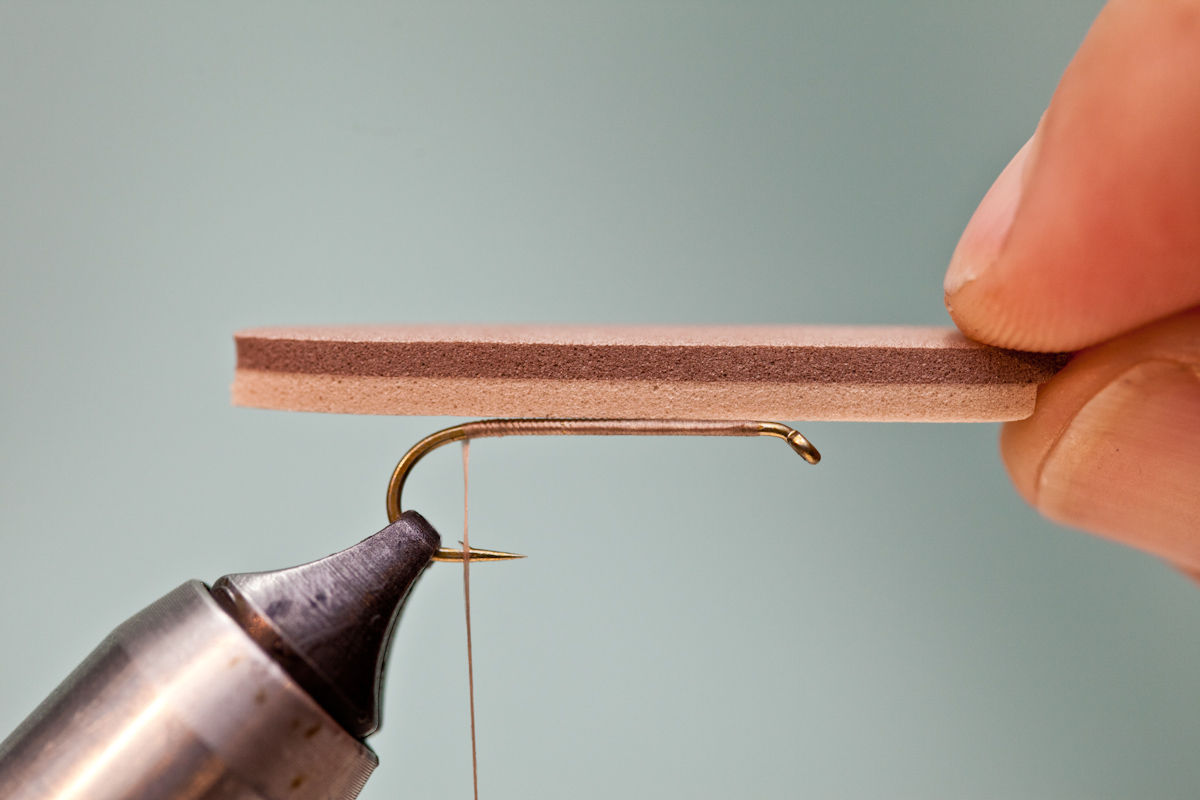 Step 2: Prepare a 4mm thick piece of foam body. Taper end as shown. Size of foam body should be about gap of hook in width, and twice the length of hook. Above, I have a pre-cut, two-tone cocoa/tan body (size medium) that is about 2 inches long.
 Pre-cut foam body that is about as wide as gap of hook. This will be placement of foam body on hook.
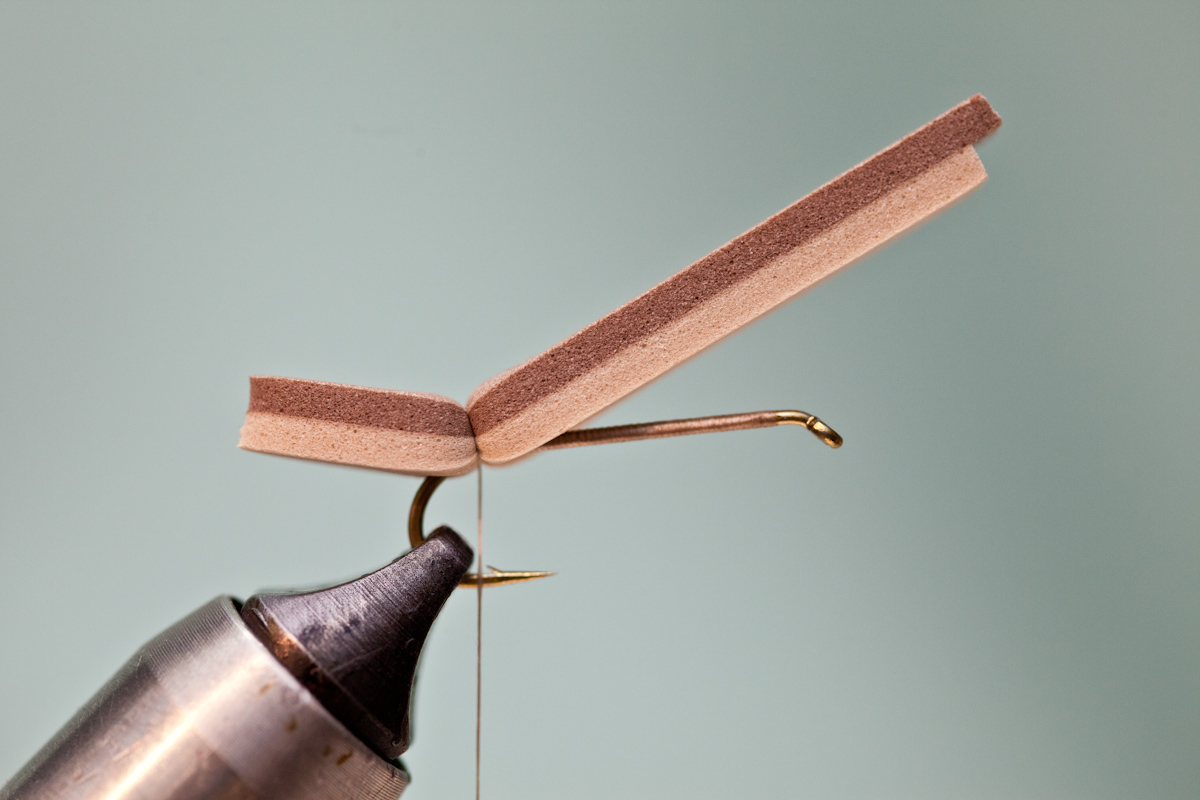 Step 3: Bind down the hopper body with 3-4 firm thread wraps.
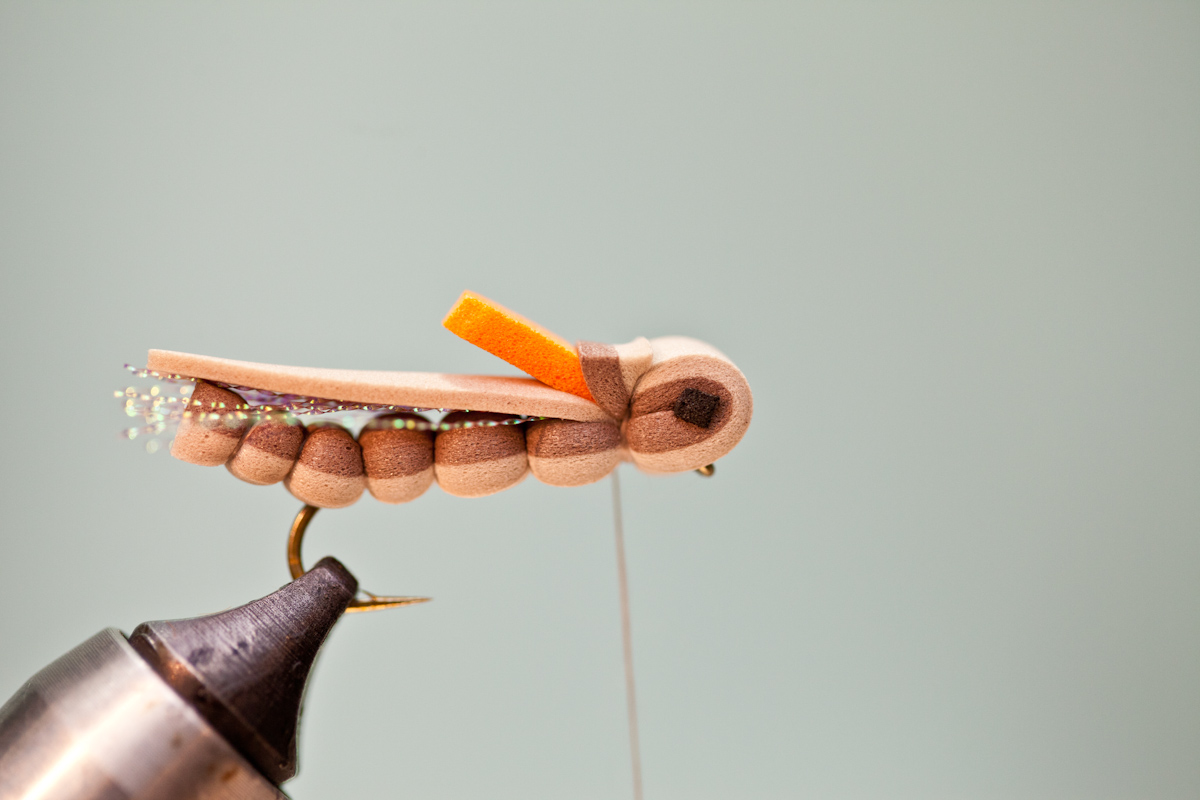
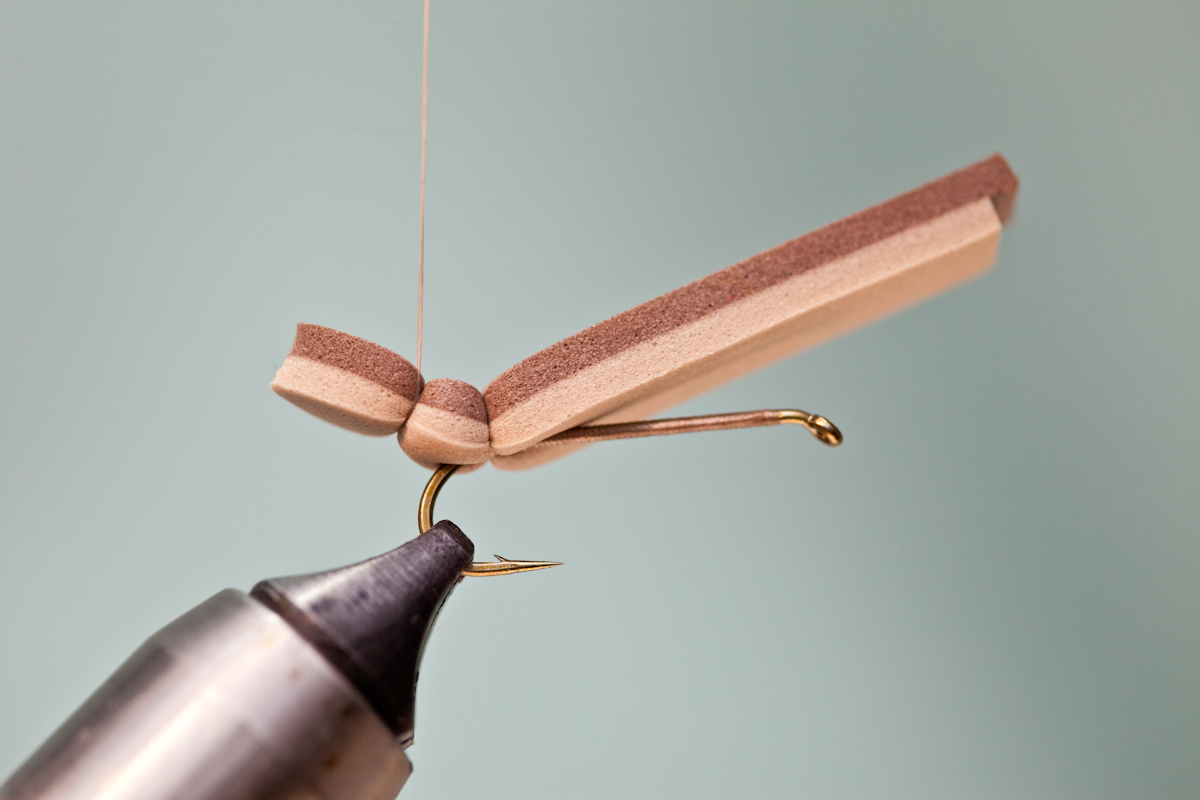 Step 4: Form a body segment by crossing the thread over the top of the foam strip. Next, wrap 2-3 times to create first segment.
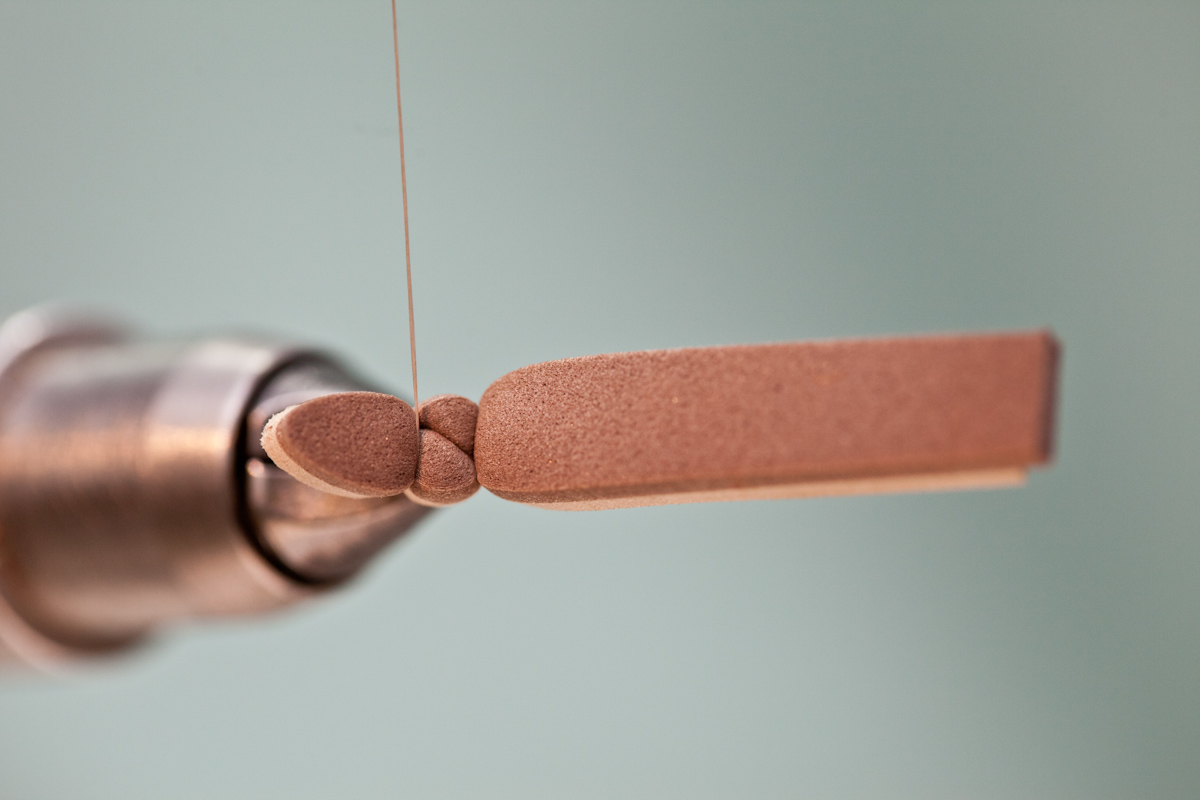 Top view of first body segment.
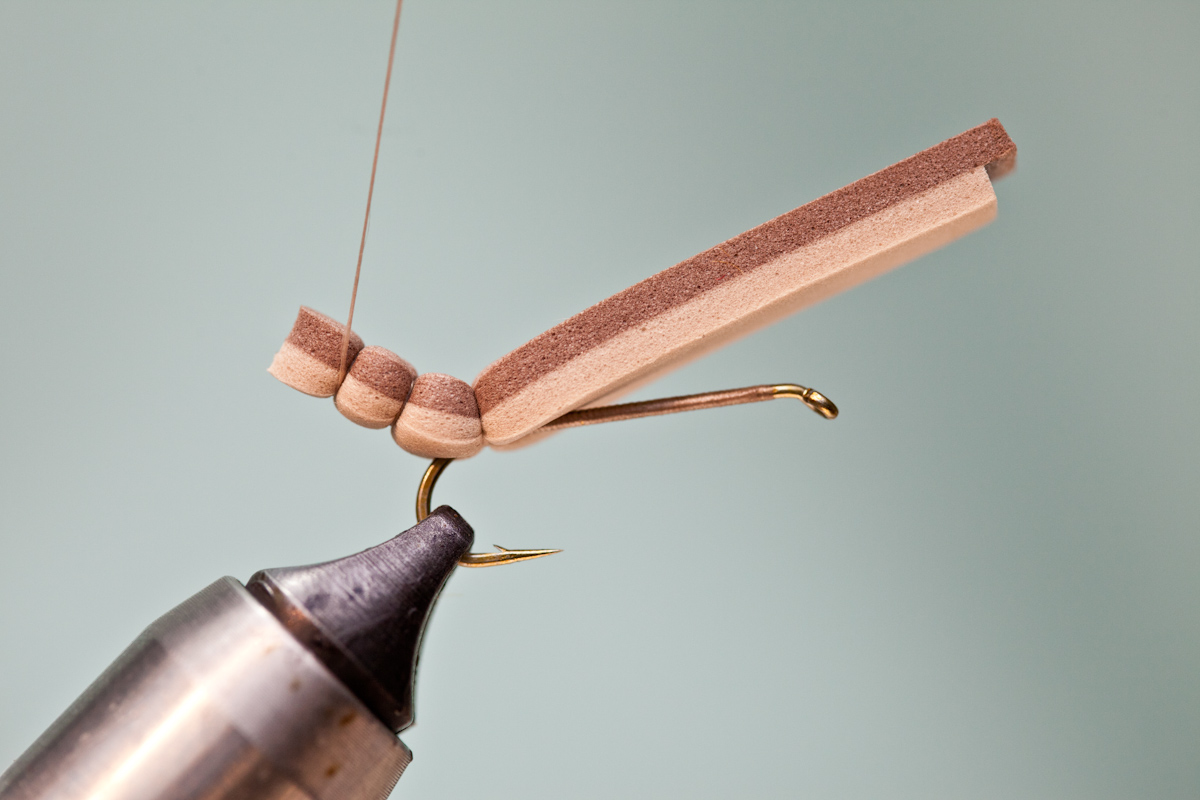 Step 5: Advance thread back, on top of foam body, to create second body segment. Form segment with 2-3 thread wraps.
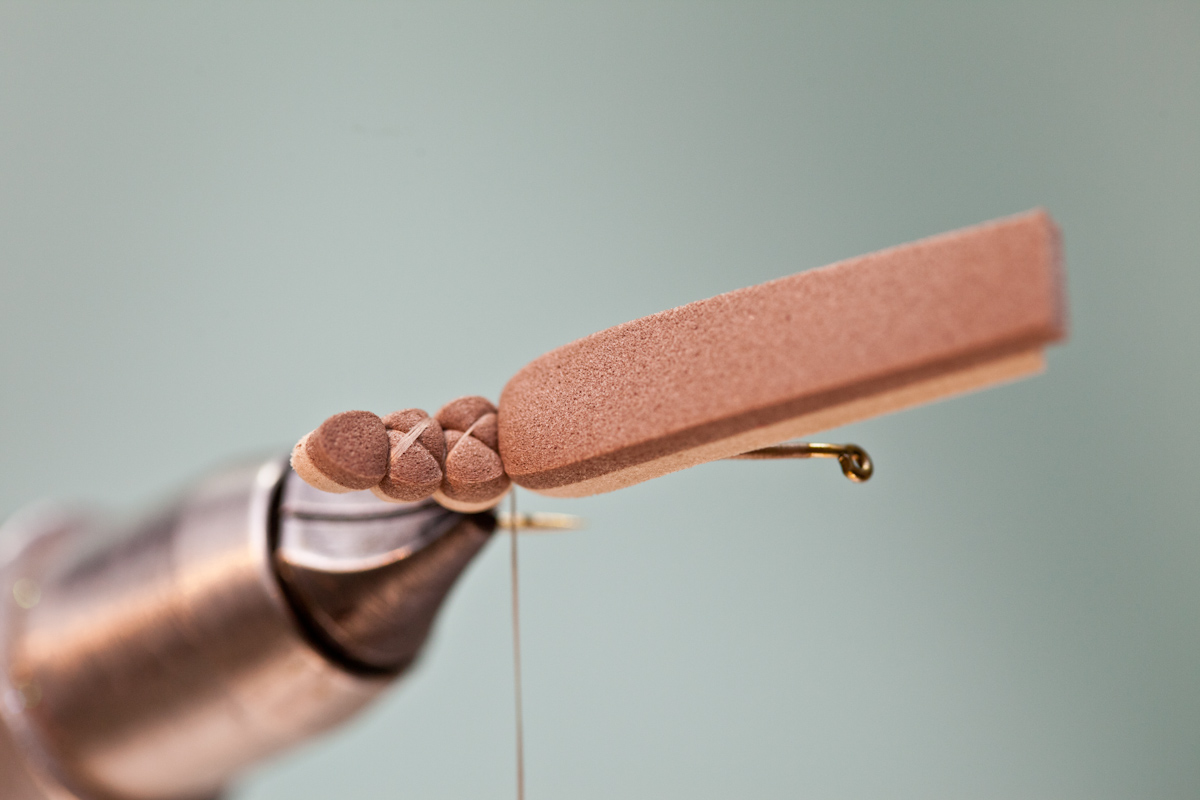 Step 6: Advance thread to hook barb by criss-crossing thread forward over the two body segments.
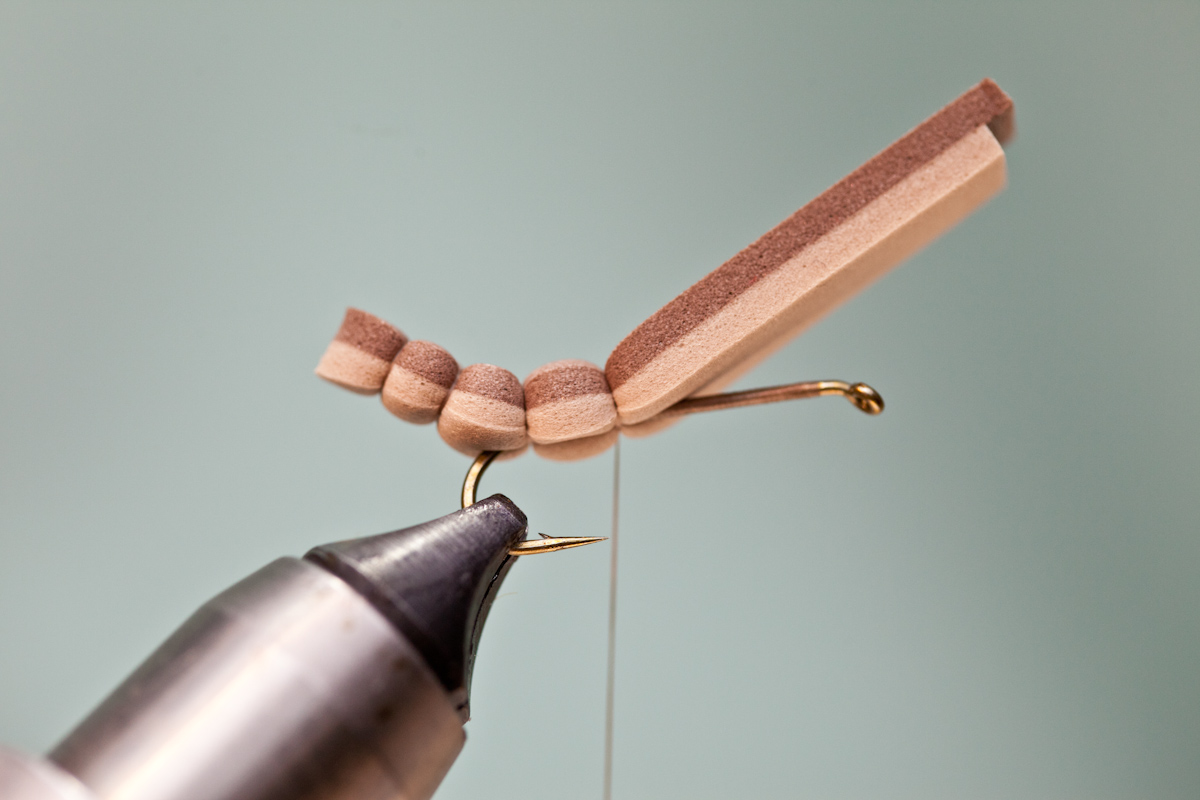 Step 7: Advance thread forward, on hook only, just in front of hook point. Next, bind down third body segment with 3-4 firm thread wraps.
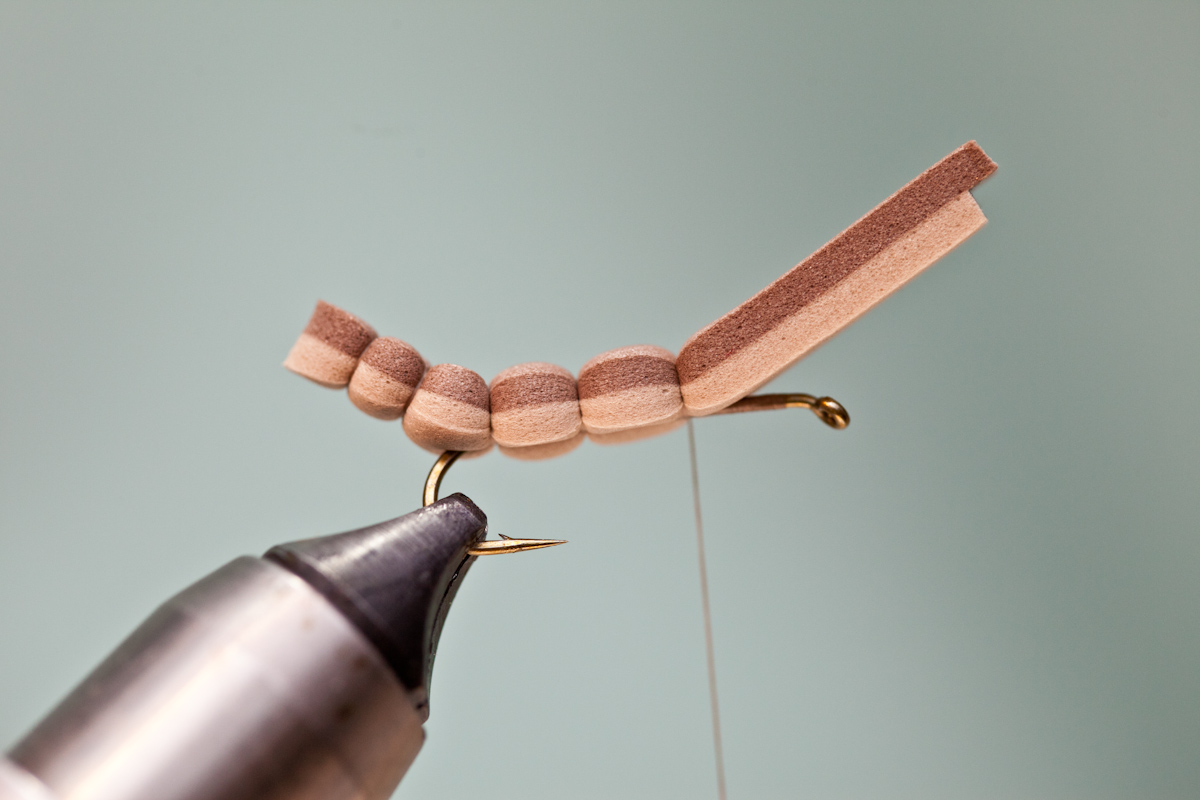 Step 8: Advance thread forward, on hook only to just beyond 1/2 way point on hook shank, as pictured above. Next, bind down foam hopper body with 3-4 firm thread wraps.
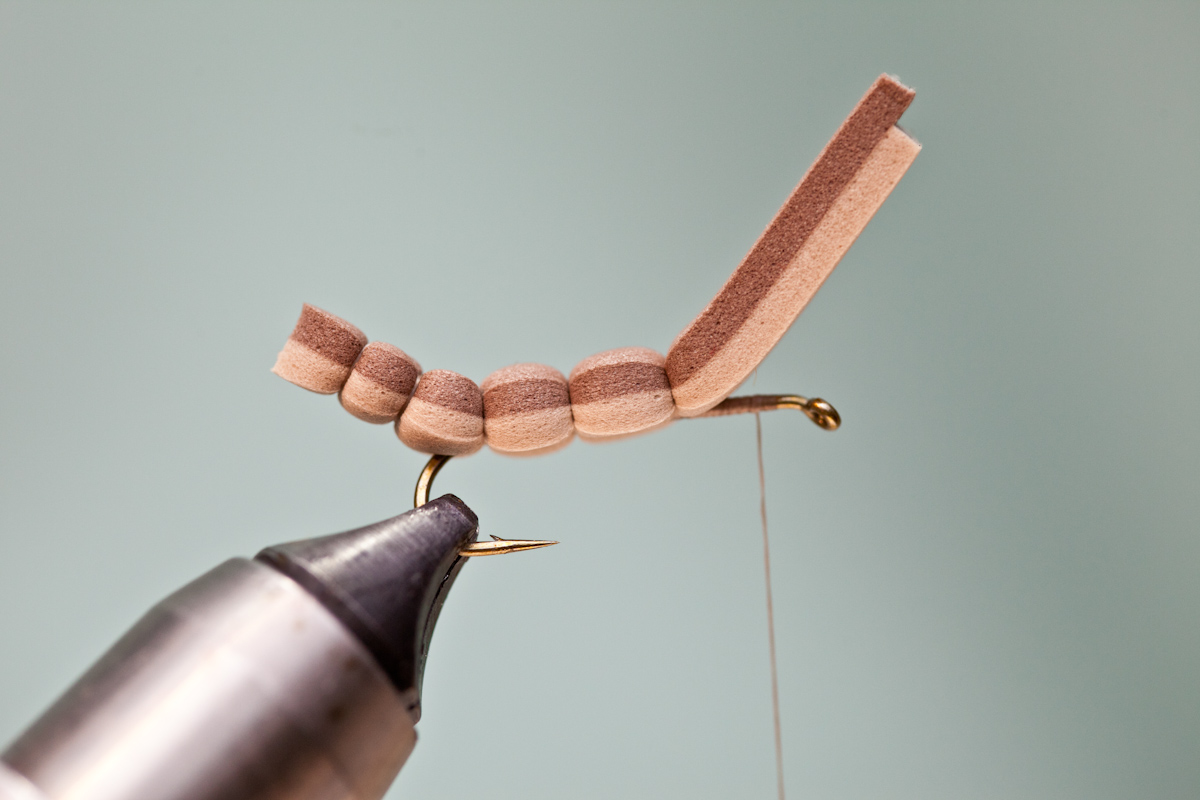 Step 9: Advance thread forward, on hook only, 1/2 the distance between hook-eye and body segment as pictured above. Try not to get too close to the hook eye because the rest of the hopper is tied in at this point.
 Step 10: Bind down foam hopper body with 2-3 firm thread wraps.
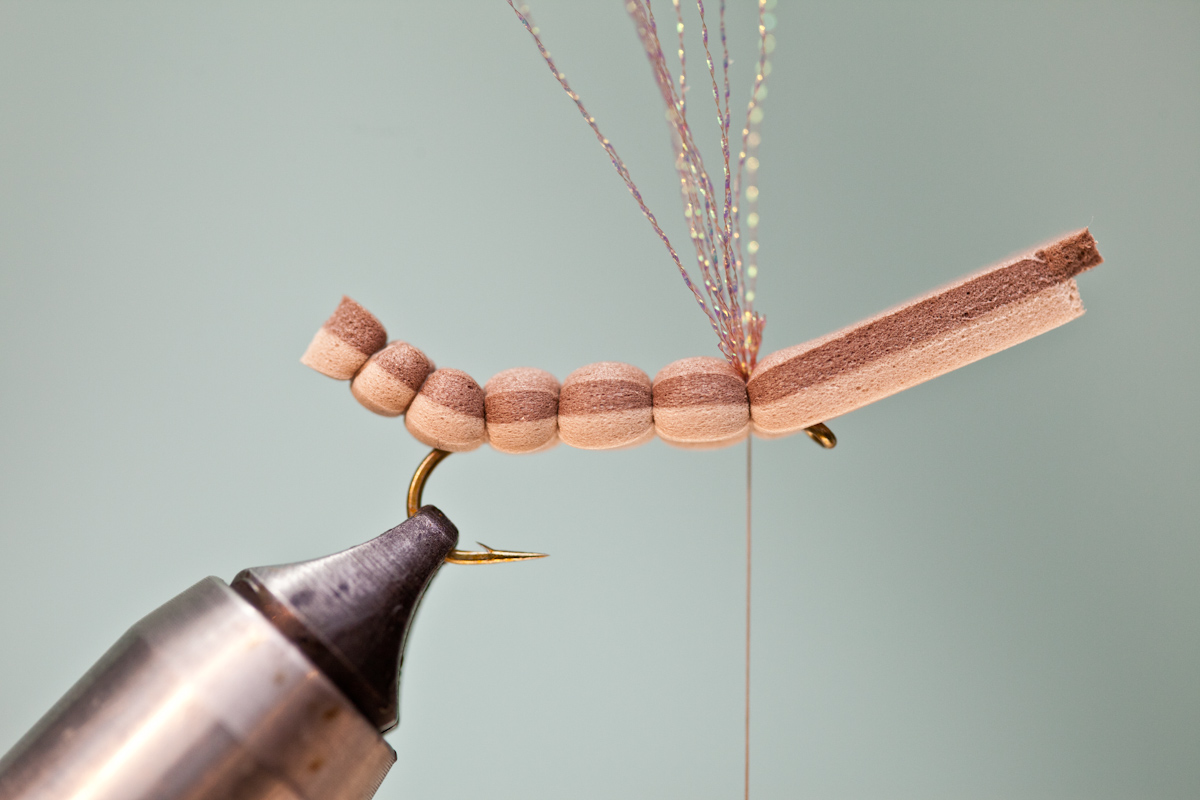 Step 11: Tie in 6-10 strands of micro flash. Trim so ends extend just beyond body of hopper.
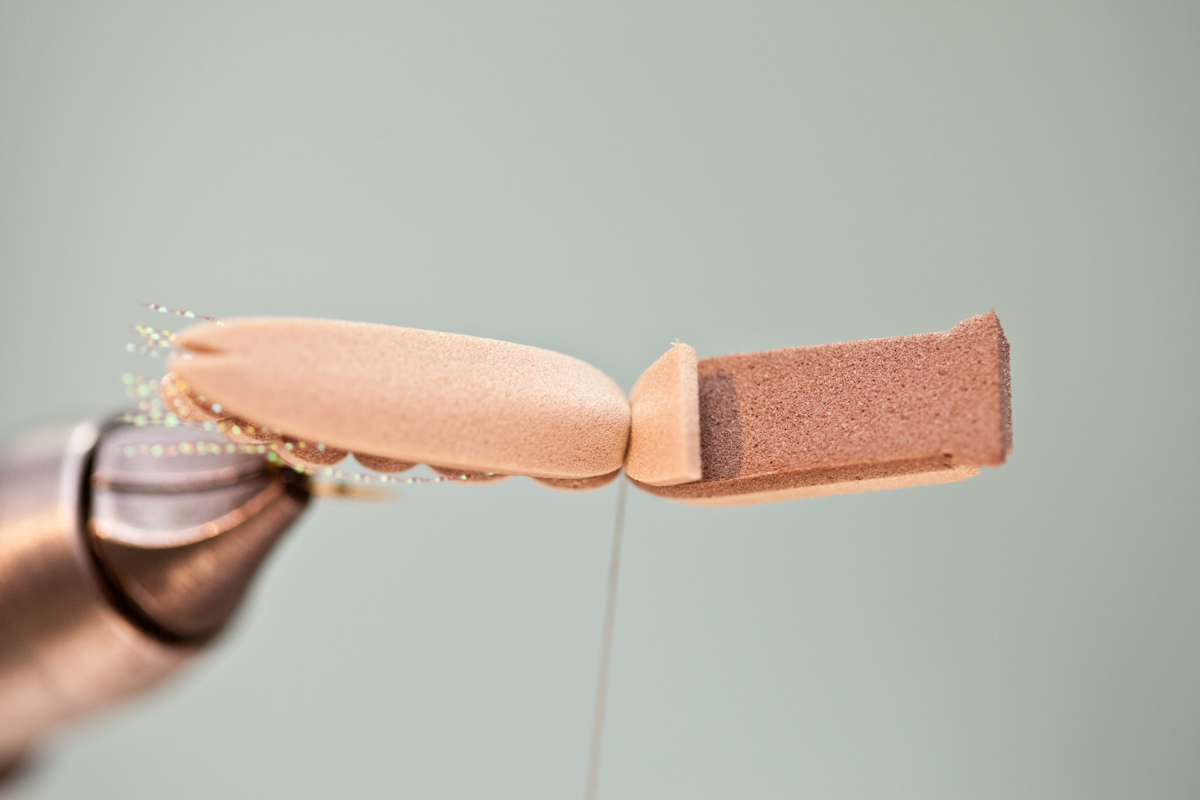
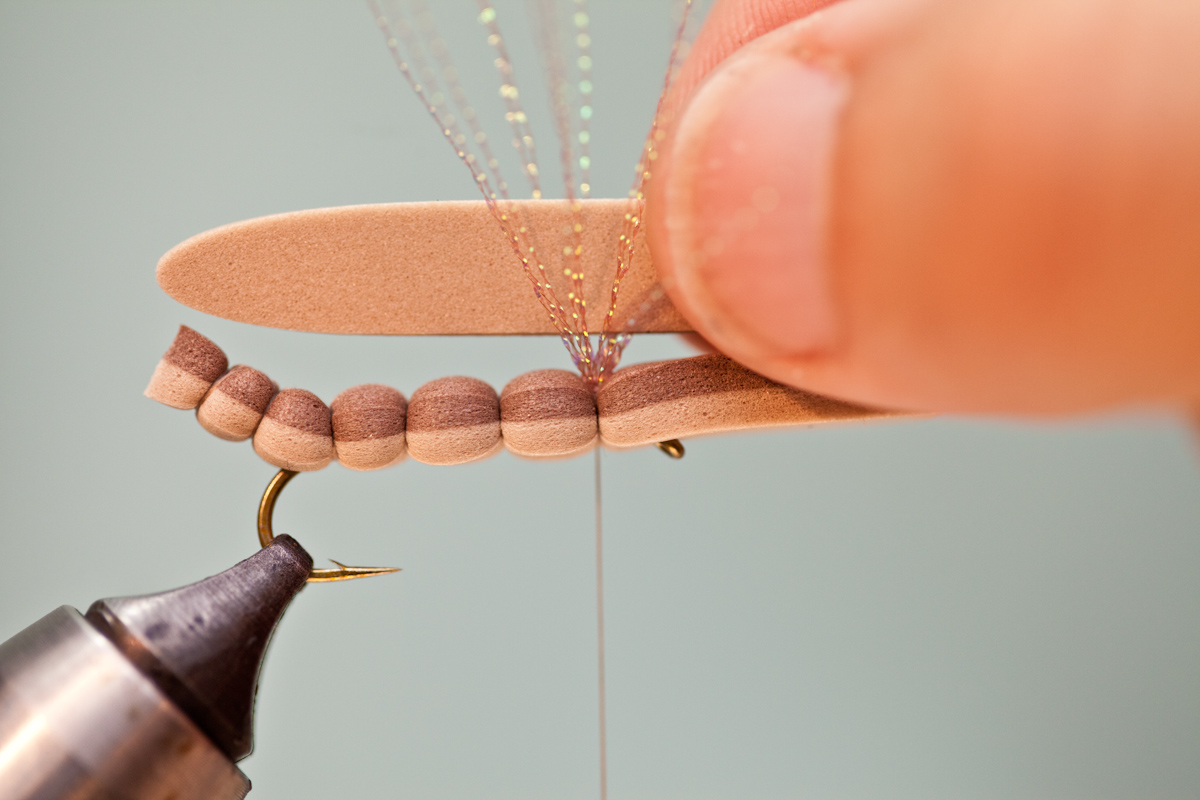 Step 12: Shape a piece of 1mm tan foam for the wing of the grasshopper. The wing is gap of hook in width and about 1 1/2″ long.
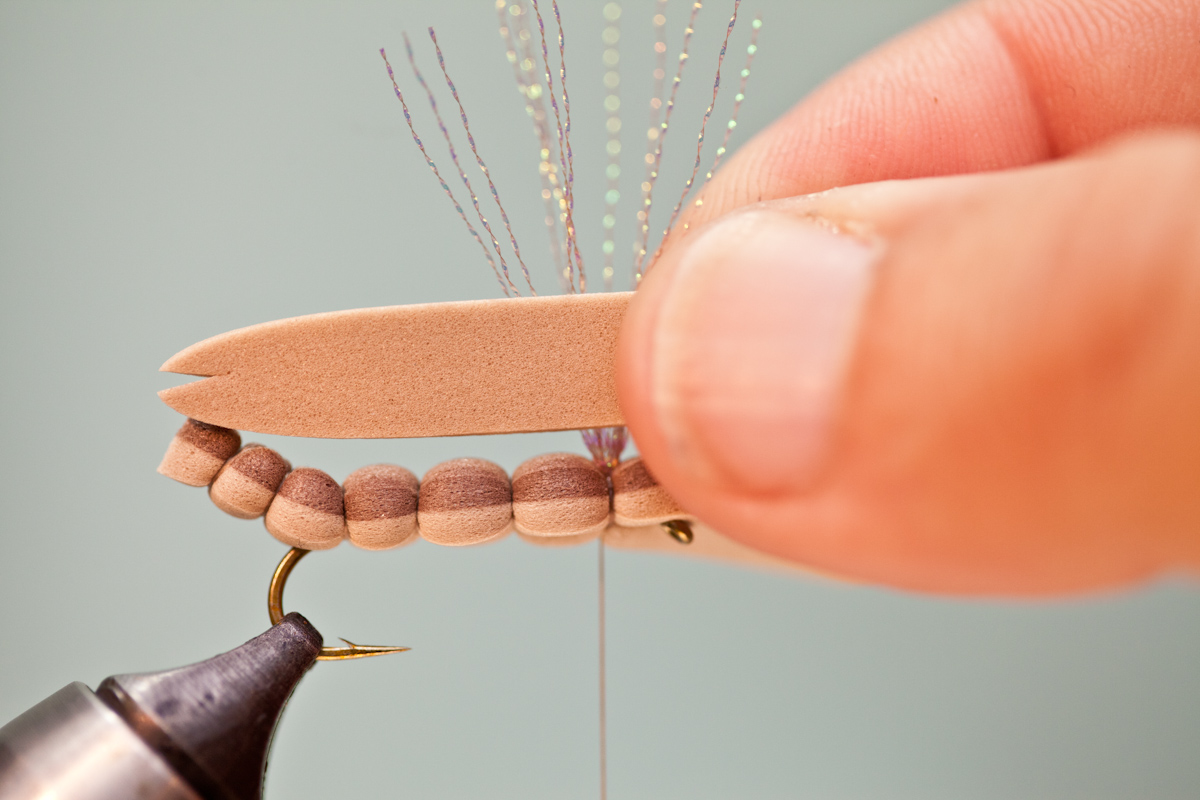 Step 13: Trim out small notch in end of wing.
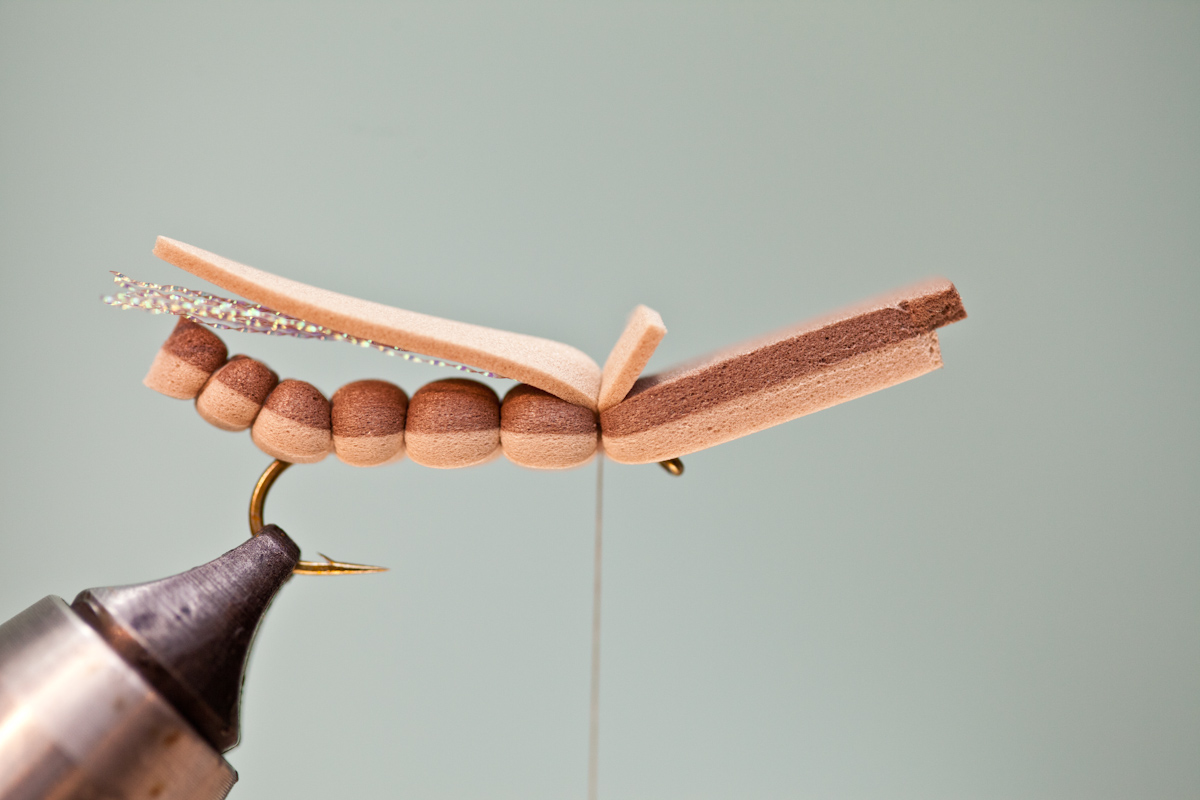 Step 14: Bind down wing with 2-3 firm wraps of thread. End of wing should extend to just beyond hopper body.
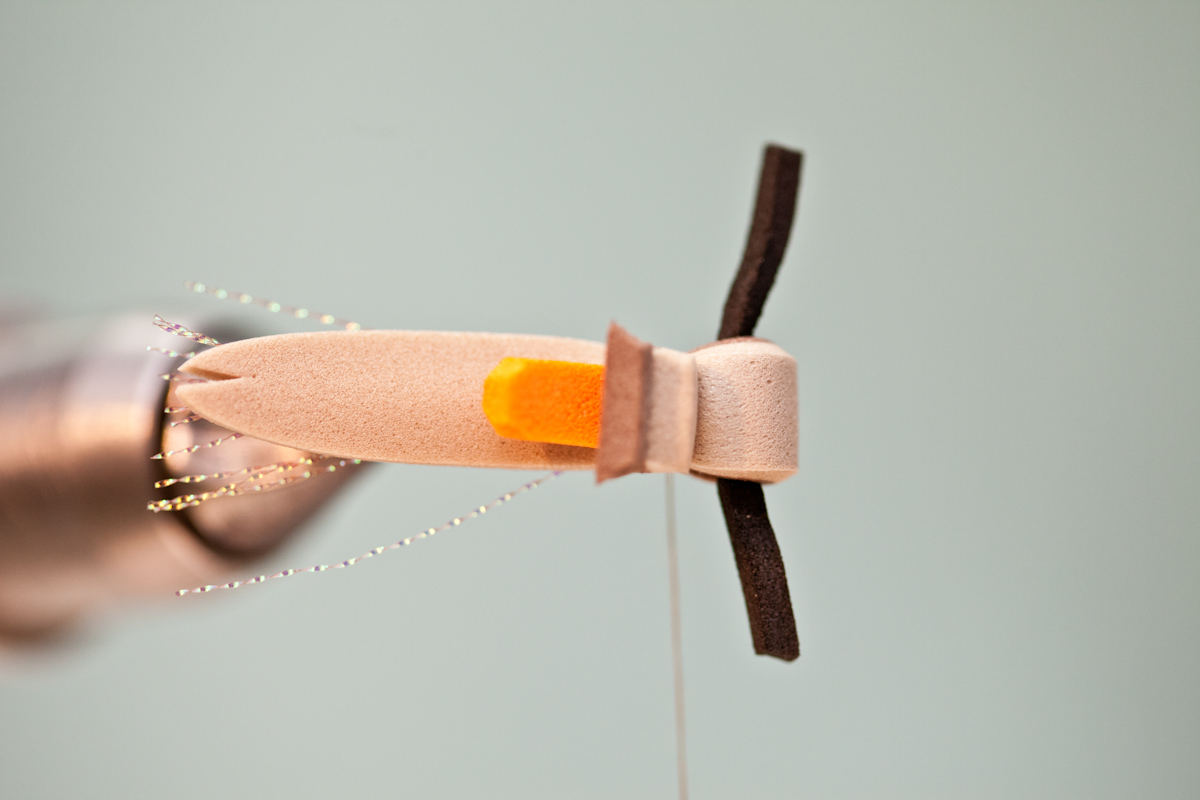
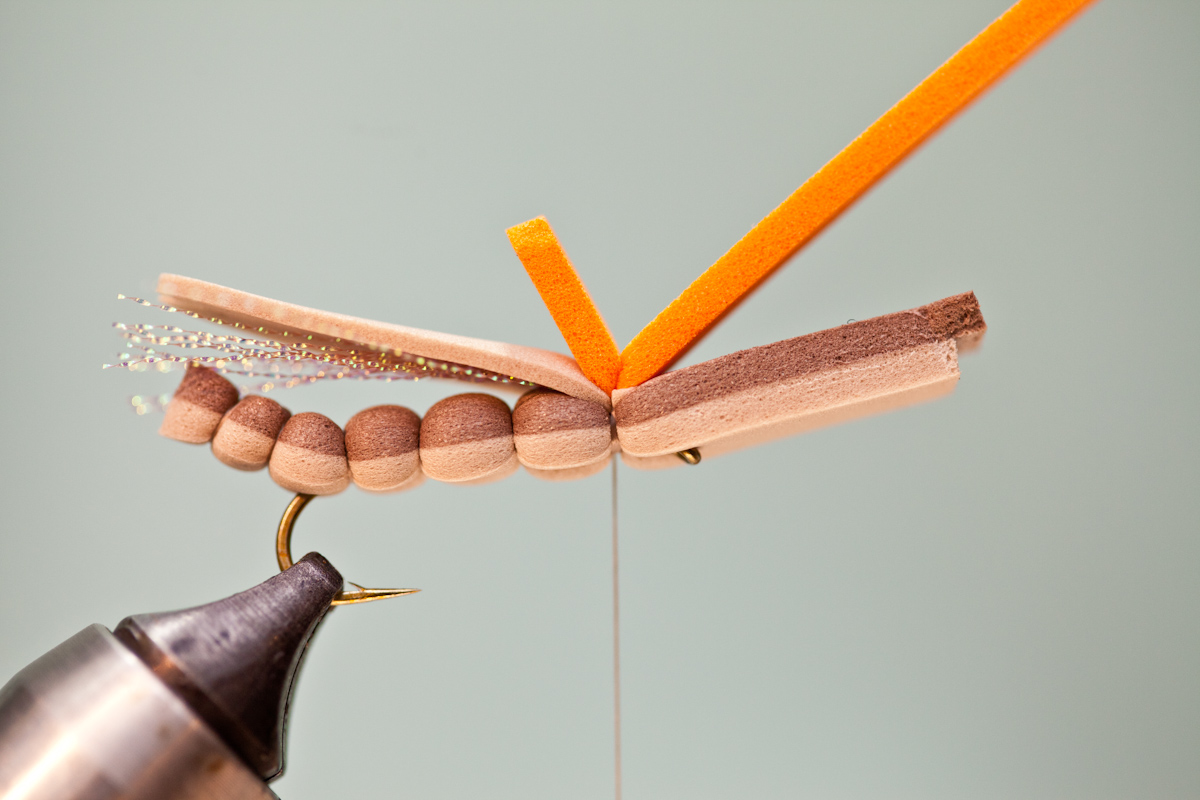 Step 15: Trim wing butts. Next, bind down hi-viz 2mm foam post with 2-3 firm wraps of thread.
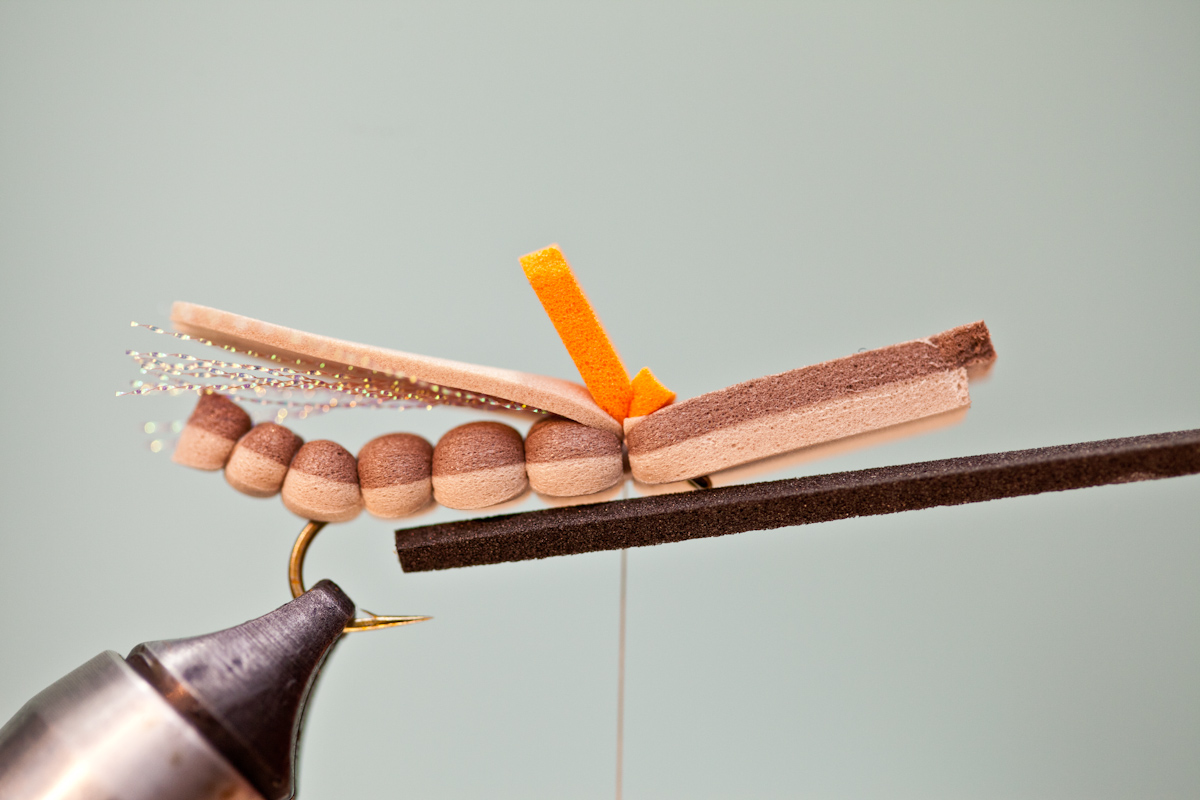 Step 16: Trim a small strip of 2mm black foam.
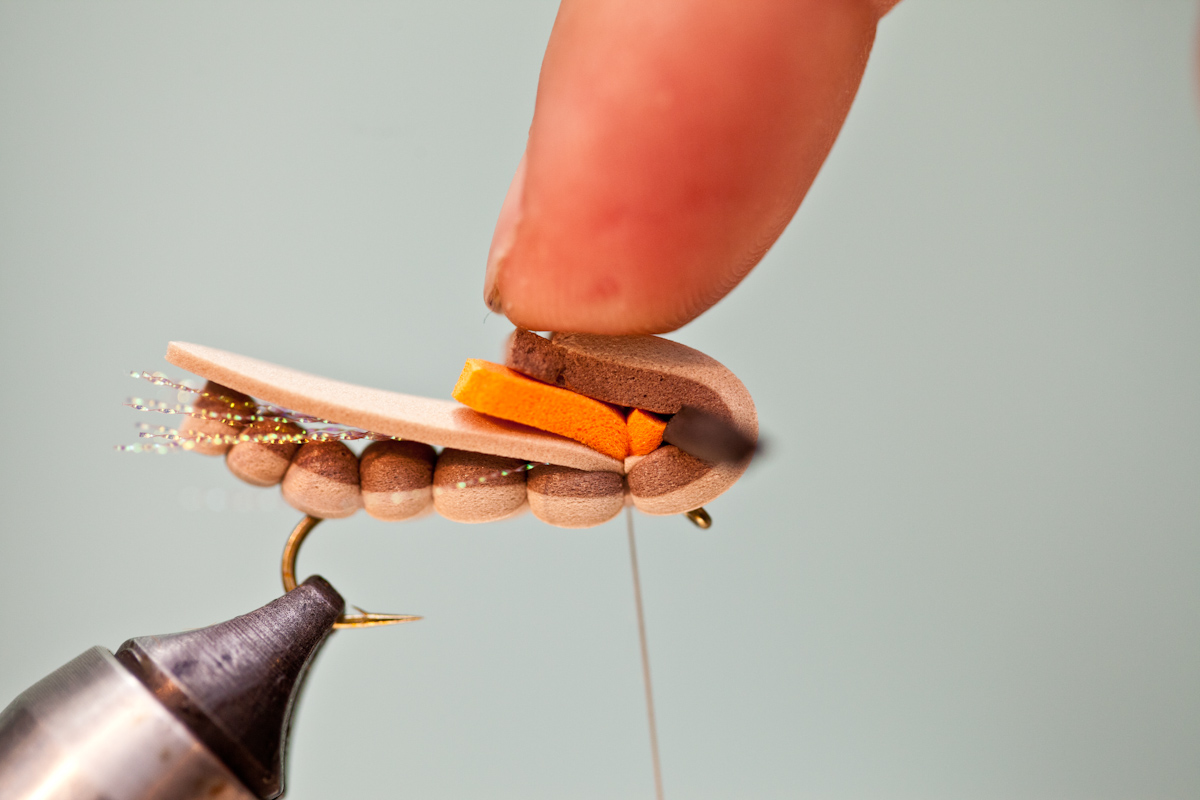 Step 17: Fold foam body over the small strip of black foam as shown above. Here we are forming the bullet-head of the hopper. Notice how the fold of foam extends beyond the eye of the hook.
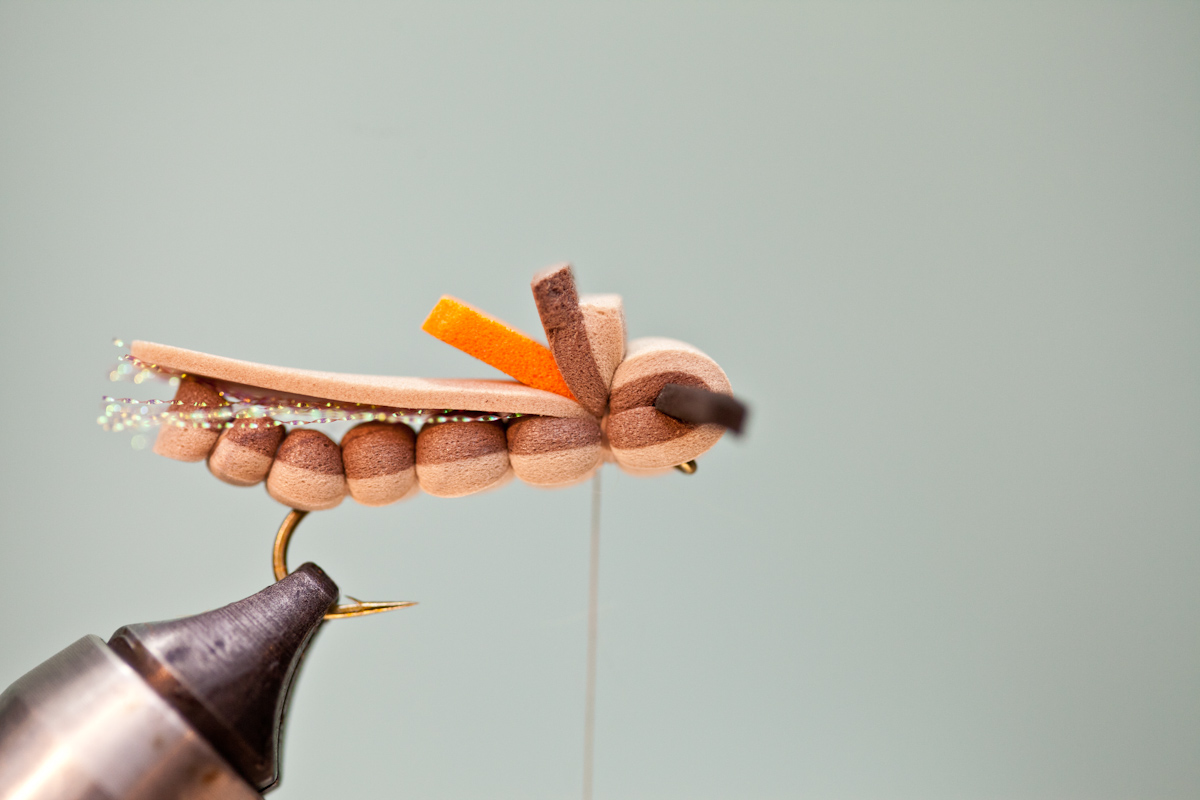 Step 18: Bind down head of hopper with 4-5 firm thread wraps.
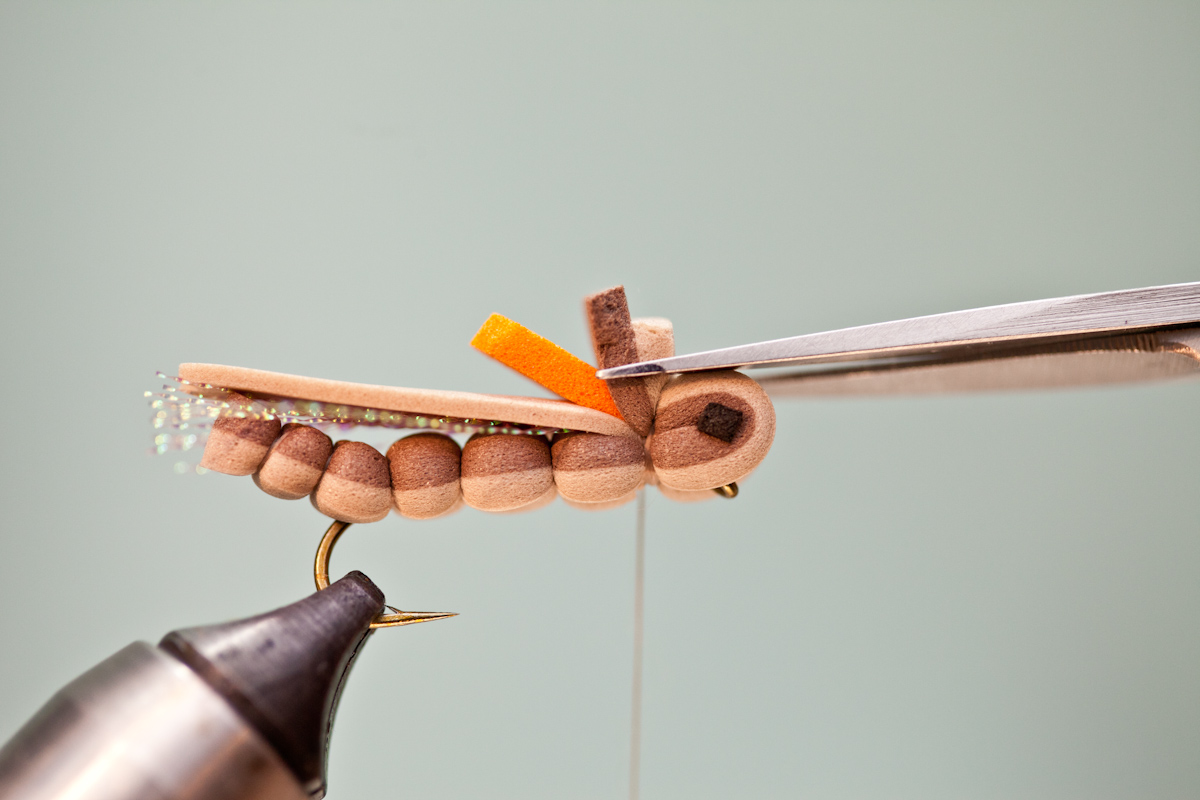 Step 19: Trim butts of body flush, as pictured above. Next, trim black foam strips flush with the head of the hopper to form the eyes. You can also leave the eyes a little long for a more dramatic effect.
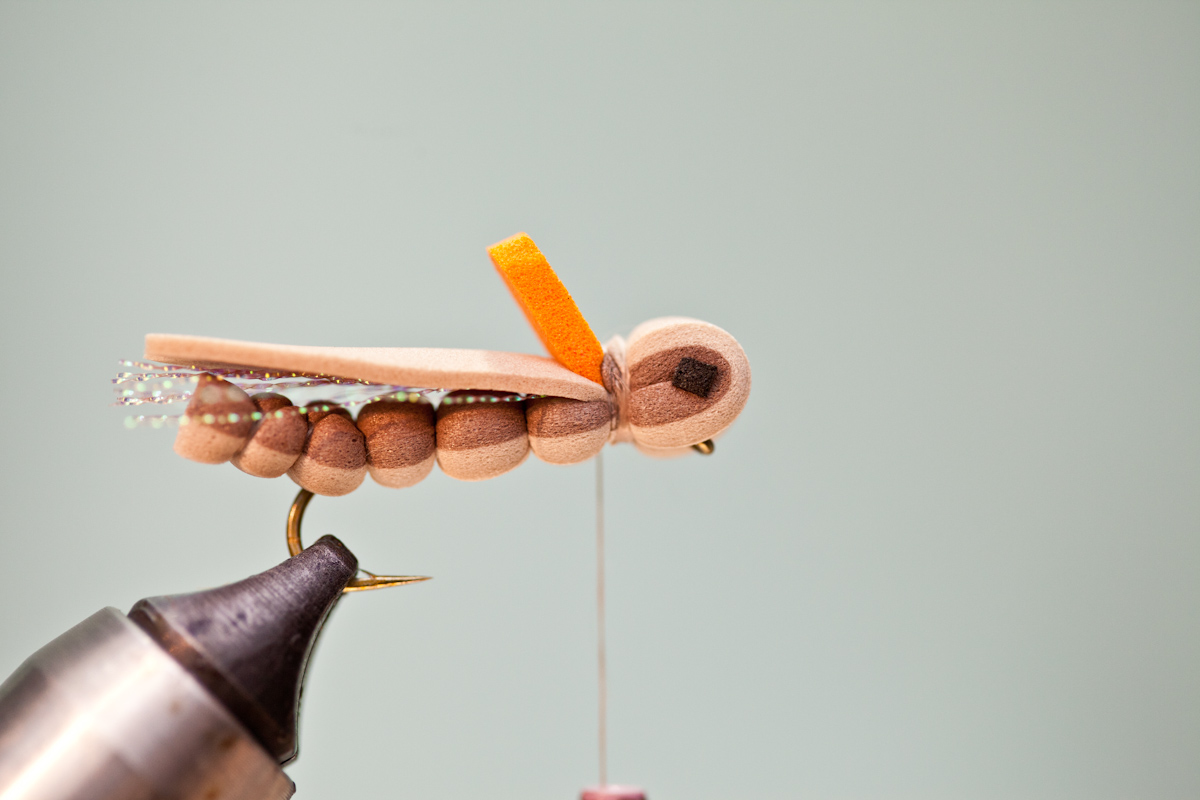 Step 20: Bind down foam butts that you just trimmed with 8-10 wraps of thread.
 Step 21: Thunder Thighs. Trim a thin strip of two-tone foam. Next, cut strips of foam at angle, like the angle pictured above. Tie an over-hand knot in rubber material, insert pointed end of foam strip in over-hand knot and tighten rubber material around the foam strip. For more detailed instructions on making these foam legs go to the original Thunder Thighs tutorial, steps 10-14.
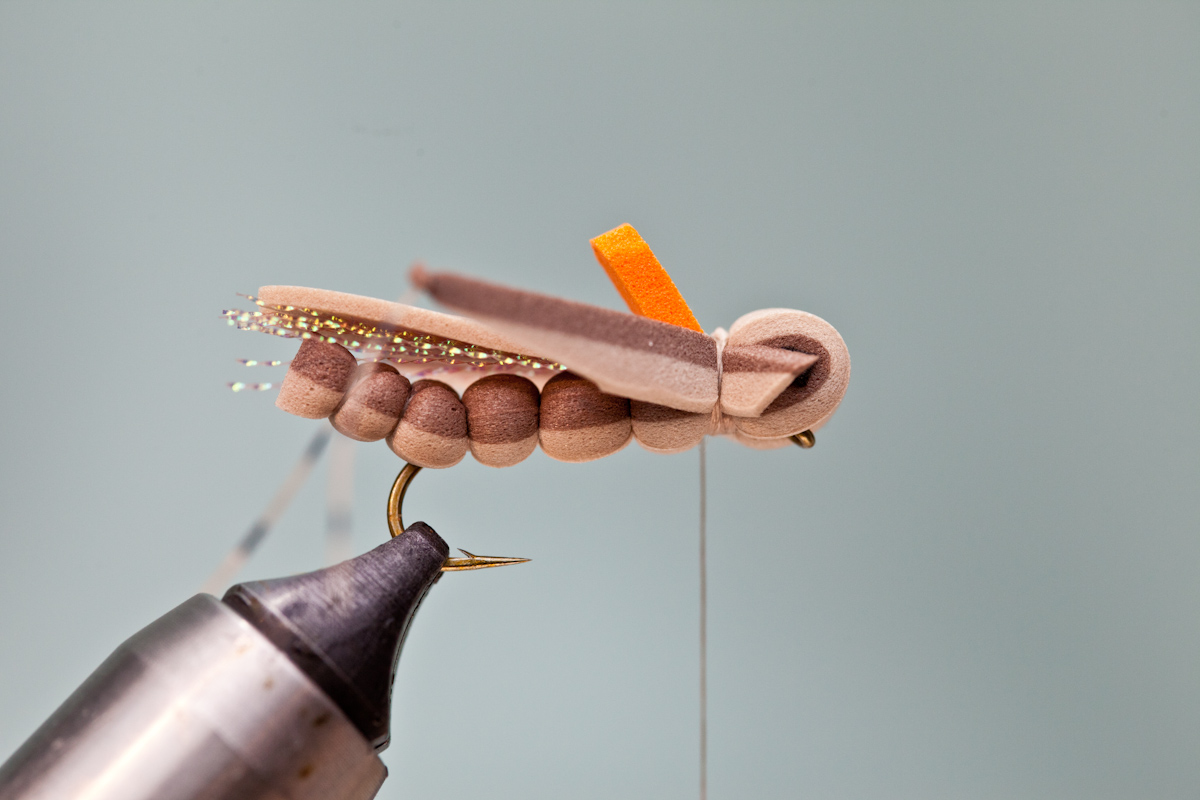 Step 22: Tie in Thunder Thigh legs.
 Notice, legs extend to last body segment.
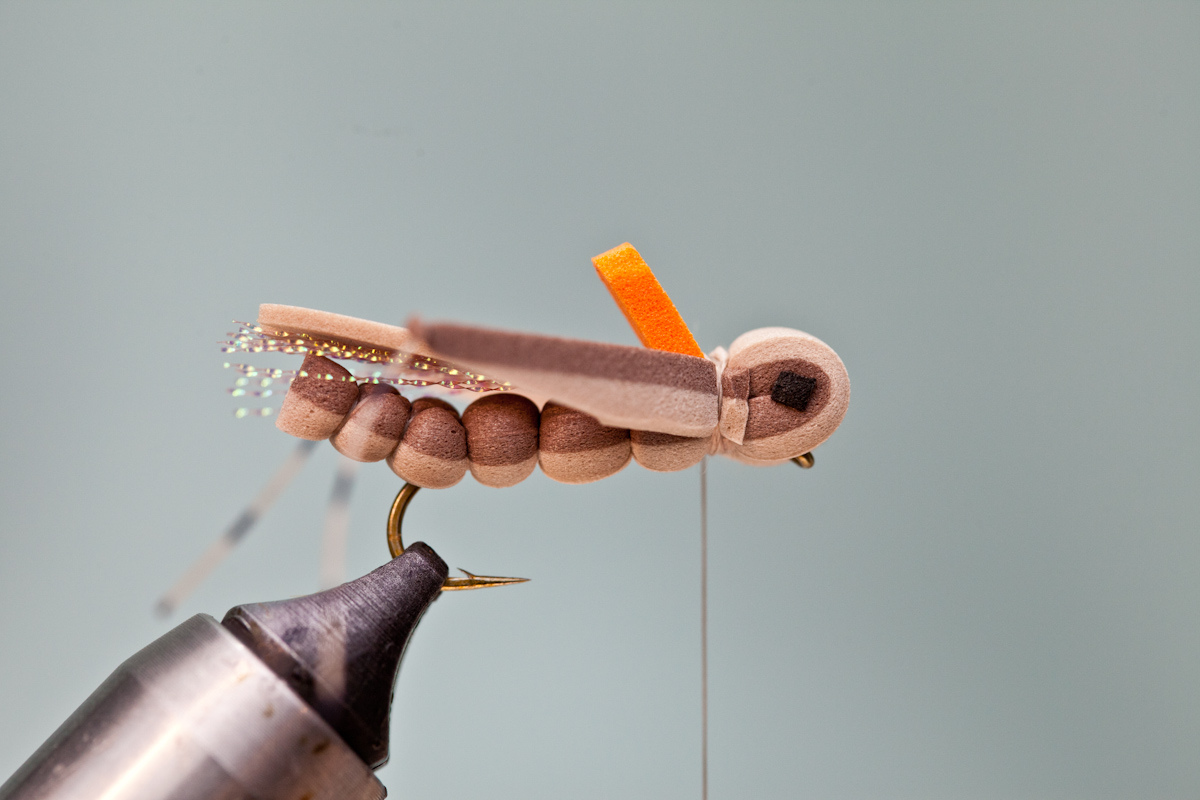 Step 23: After tying in both legs, trim butts of legs. Next, wrap over butts of legs with a few thread wraps.
 Step 24: Tie in front legs of hopper.
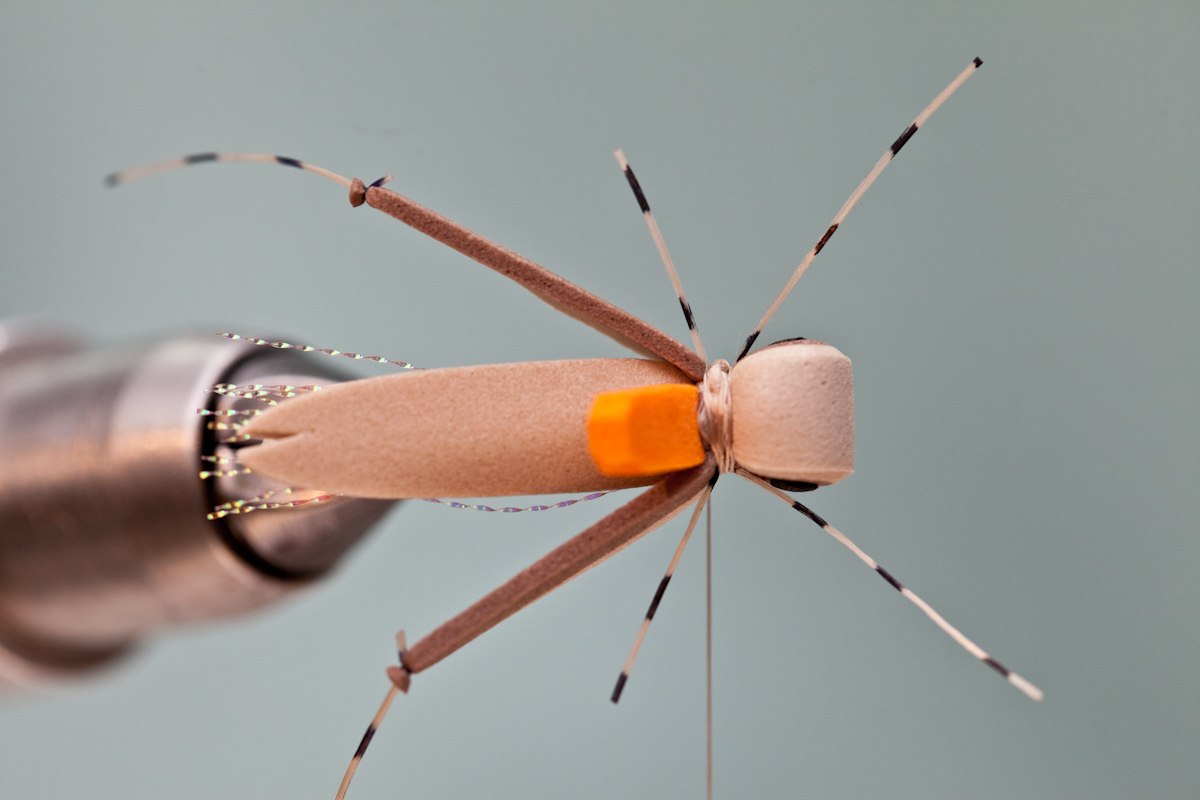 Top view of front legs tied in.
 Step 25: Apply dubbing to thread. Next, cover any exposed thread wraps with dubbing. Finally, lift up head of hopper, and tie off hopper behind hook eye.
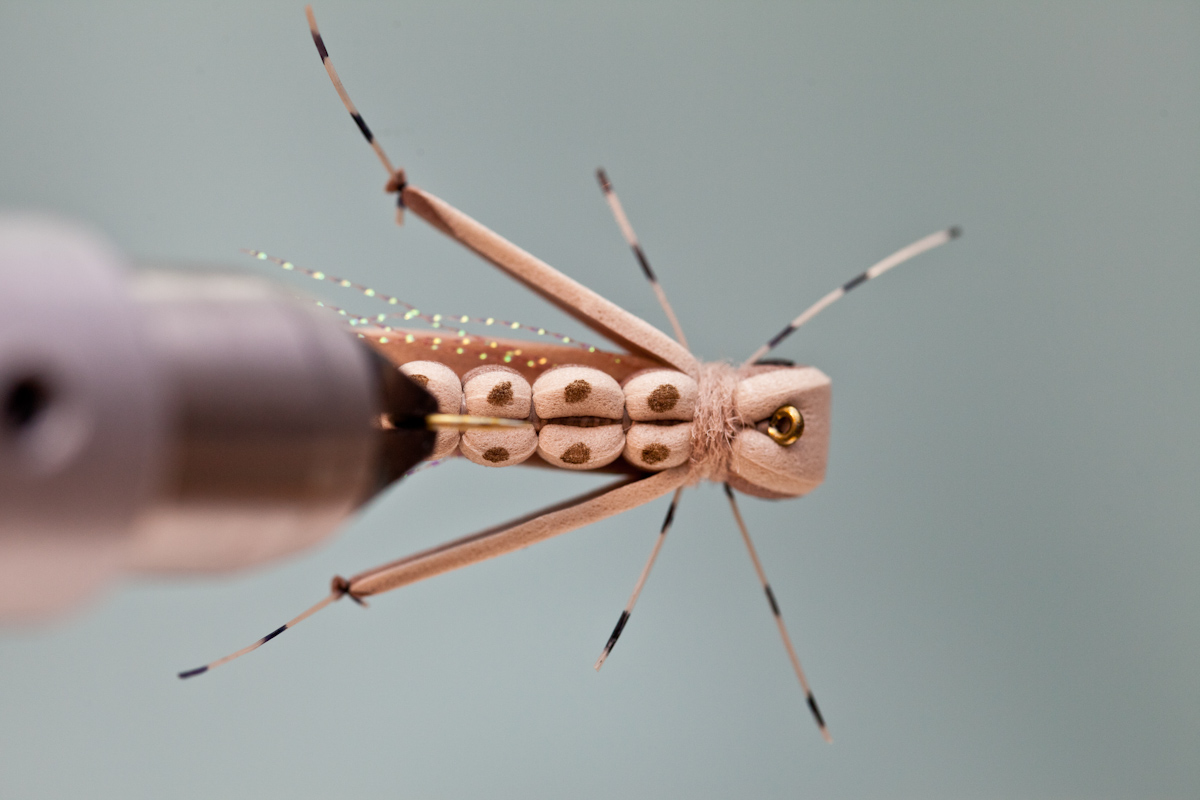
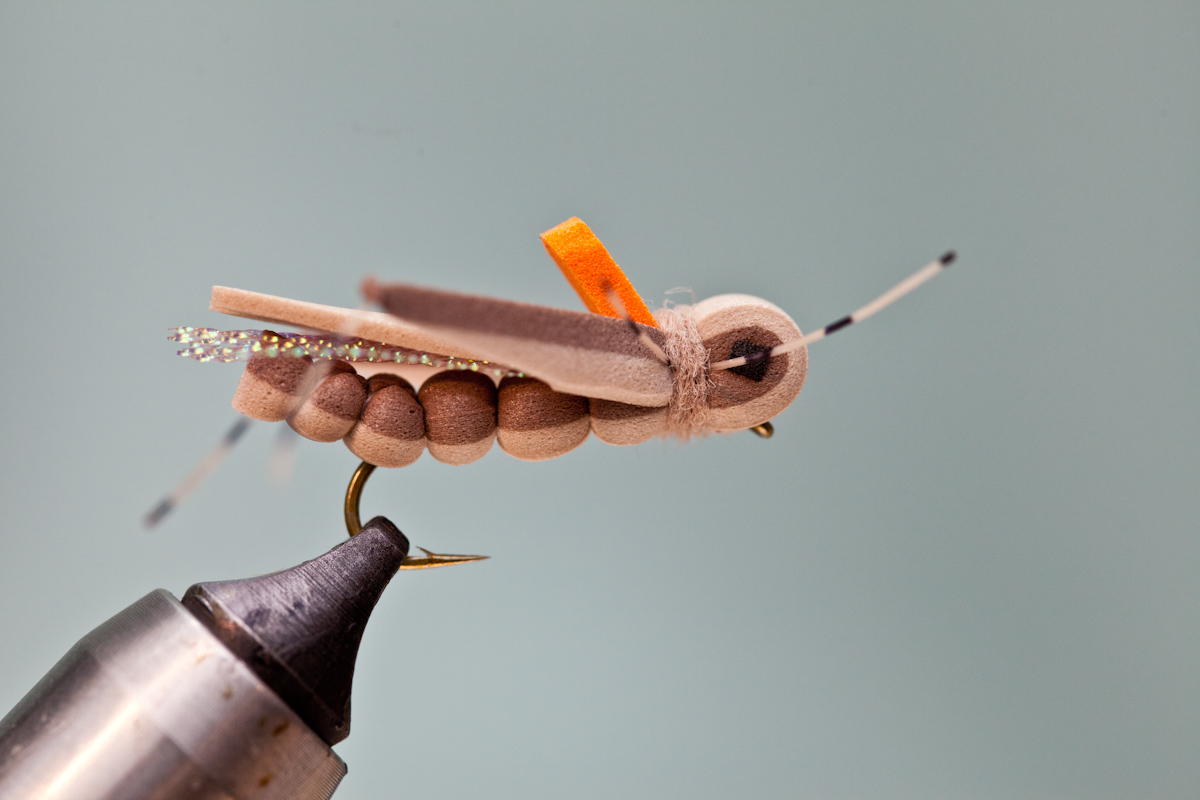 Step 26: Completed Thunder Thigh Hopper
 Top view of killer hopper pattern.
Side view of hopper. Notice I marked the belly of the hopper with a bronze Prismacolor marker.

I really like the looks of that hopper. Looks fun to tie as well. Thanks for sharing. I’ll be sure to have some of these in my fly box.
Ben
Ben, how have these worked out for you? I like Llano Bugs because they’re easy enough to tie- but this does look fun.
Nice hooper. Really enjoyed going through your blog. I dont have any hopper eating trout around me but I like to tie them for fishing smallmouth bass. You have given me some good ideas. Thanks
Wow! Awesome hopper! I want a handful 😉 Great tutorial aswell
Nice pattern, I’m wondering why natural materials are used at all on foam patterns? To catch fishermen? Improved Thunder Thighs is moving in the right direction.
K
you are a true artist! i just started dressing treble hooks with bucktail and feathers and its challenging! lol you have a skill like no others! keep up the work
dave
These hoppers are amazing! When I saw this blog title I thought ‘wow, now that’s a specific topic for a blog’. On reading and having a look at some of your patterns, I’m truly impressed. Now, to the tying table to see what I can come up with…